En este post te mostraré el juego de Tetris programado en JavaScript puro, totalmente gratuito y open source.
Este juego de bloques está programado con JavaScript y utiliza canvas para pintar el juego. También utilizo Bootstrap para el diseño de los botones y la página en general, con un poco de SweetAlert para las ventanas.
Aunque se vea sencillo de hacer, es uno de los trabajos que más me ha costado realizar y del cual me siento más orgulloso. Fue complejo (para mí) comprender toda la lógica para las colisiones, rotaciones, eliminación de filas, movimiento de piezas, límites, etcétera.
Entre las características del juego encontramos:
- Sonidos: música de fondo, sonido cuando la pieza no se puede rotar, cuando se hace una fila completa y cuando el tetrominó toca el suelo
- Colores: cada pieza tiene un color aleatorio elegido en tiempo de ejecución
- Rotaciones: las piezas se pueden rotar para acomodarlas y acumular puntos
- Compatible con móviles: debido a que es web, he agregado unos botones para poder jugarlo en móviles, pero también se puede jugar con el teclado
- Código abierto: puedes modificar el juego, el tablero, la longitud, velocidad, piezas, rotaciones, etcétera.
- Port de tetris: se comporta como cualquier juego de tetris normal
- Pausa del juego: el juego se puede pausar o reanudar en cualquier momento
Veamos entonces los detalles de este juego programado en JS. A lo largo del post te mostraré cómo es que este juego está programado, también te dejaré una demostración y el código completo.
Nota: figura, pieza y tetrominó serán usados como sinónimos en este post.
Algoritmo general del juego de Tetris
El algoritmo es sencillo. Tenemos un plano cartesiano en donde existen las coordenadas X e Y. Tenemos 3 cosas:
- Tablero de juego: el tablero en donde se dibujará o mostrará todo
- Piezas ya existentes: los puntos o piezas que ya han caído antes; es decir, las figuras que se quedaron ahí
- Pieza actual: la pieza que va bajando actualmente y que el jugador puede mover o rotar
Ahora hacemos lo siguiente: dibujamos el tablero del juego (vacío), luego sobreponemos las piezas existentes y finalmente colocamos la pieza actual (la que va bajando).
En cada movimiento o intento de rotación, verificamos si la pieza no colapsa con la pared o con otra figura abajo. Cuando la pieza se rota, hacemos una simulación para ver si los puntos, después de haber sido rotados, no colapsarán con otra pieza.
Además, cuando se detecta que la pieza ha llegado al suelo, se inicia un temporizador que bajará la siguiente pieza en determinados milisegundos (de este modo el jugador tiene tiempo para mover la pieza).
Antes de mostrar otra figura, se mueven los puntos de la figura actual a las piezas existentes.
Lo demás son colisiones y trabajos con arreglos. Por ejemplo, para verificar si una fila está llena recorremos cada punto del arreglo en determina posición de Y y verificamos si está tomado.
Todo el dibujo del juego lo hacemos en un requestAnimationFrame y dibujamos una matriz sobre Canvas usando JavaScript.
Música del juego
El juego tiene varios sonidos. Todos los sonidos son inyectados de manera invisible. Se inician así:
initSounds() {
    this.sounds.background = Utils.loadSound("assets/New Donk City_ Daytime 8 Bit.mp3", true);
    this.sounds.success = Utils.loadSound("assets/success.wav");
    this.sounds.denied = Utils.loadSound("assets/denied.wav");
    this.sounds.tap = Utils.loadSound("assets/tap.wav");
}
En este caso el sonido de fondo es reproducido en loop, para que se repita infinitamente. Luego, lo reproducimos así (línea 1):
resumeGame() {
    this.sounds.background.play();
    this.refreshScore();
    this.paused = false;
    this.canPlay = true;
    this.intervalId = setInterval(this.mainLoop.bind(this), Game.PIECE_SPEED);
}
Clases ayudantes
Punto
Un punto tiene dos cosas: coordenadas X e Y. Y un Tetrominó tiene varios puntos que lo conforman.
class Point {
    constructor(x, y) {
        this.x = x;
        this.y = y;
    }
}
Tetrominó
Como lo dije, una figura de tetris se compone de varios puntos. Además, tiene varias rotaciones. La Z, por ejemplo, tiene solo 2, pero la J tiene 4. Las rotaciones se definen igualmente como un Tetrominó, y se intercambian al rotar.
Para llevar la cuenta de la rotación en la que la figura se encuentra, se lleva un índice. Las rotaciones no son más que un arreglo que tiene varios Tetrominós, mismo que representa todas las rotaciones posibles.
class Tetromino {
    constructor(rotations) {
        this.rotations = rotations;
        this.rotationIndex = 0;
        this.points = this.rotations[this.rotationIndex];
        const randomColor = Utils.getRandomColor();
        this.rotations.forEach(points => {
            points.forEach(point => {
                point.color = randomColor;
            });
        });
        this.incrementRotationIndex();
    }

    getPoints() {
        return this.points;
    }

    incrementRotationIndex() {
        if (this.rotations.length <= 0) {
            this.rotationIndex = 0;
        } else {
            if (this.rotationIndex + 1 >= this.rotations.length) {
                this.rotationIndex = 0;
            } else {
                this.rotationIndex++;
            }
        }
    }

    getNextRotation() {
        return this.rotations[this.rotationIndex];
    }

}
Como puedes ver, el color se elige en la línea 6. Al momento de elegir la figura, cada punto de cada rotación de la misma es coloreado con el color aleatorio.
Funciones útiles
Antes de continuar veamos las funciones útiles. Entre ellas tenemos la función que carga el sonido, la que elige un color aleatorio o la que elige un número aleatorio para saber cuál figura elegir:
class Utils {
    static getRandomNumberInRange = (min, max) => {
        return Math.floor(Math.random() * (max - min + 1)) + min;
    }

    static getRandomColor() {
        return Game.COLORS[Utils.getRandomNumberInRange(0, Game.COLORS.length - 1)];
    }

    static loadSound(src, loop) {
        const sound = document.createElement("audio");
        sound.src = src;
        sound.setAttribute("preload", "auto");
        sound.setAttribute("controls", "none");
        sound.loop = loop || false;
        sound.style.display = "none";
        document.body.appendChild(sound);
        return sound;
    }
}
Por ejemplo, la función getRandomColor elige un color aleatorio del arreglo estático de la clase Game que veremos a continuación. Y esta función reutiliza la función llamada getRandomNumberInRange que devuelve un número en determinado rango.
Funcionamiento del juego
Comencemos viendo las constantes del juego, como lo son el tamaño del tablero, los colores, la puntuación que se da al usuario cuando hace una fila de puntos o los colores aleatorios para elegir:
// Square length in pixels
static SQUARE_LENGTH = screen.width > 420 ? 30 : 20;
static COLUMNS = 10;
static ROWS = 20;
static CANVAS_WIDTH = this.SQUARE_LENGTH * this.COLUMNS;
static CANVAS_HEIGHT = this.SQUARE_LENGTH * this.ROWS;
static  EMPTY_COLOR = "#eaeaea";
static  BORDER_COLOR = "#ffffff";
static DELETED_ROW_COLOR = "#d81c38";
// When a piece collapses with something at its bottom, how many time wait for putting another piece? (in ms)
static TIMEOUT_LOCK_PUT_NEXT_PIECE = 300;
// Speed of falling piece (in ms)
static PIECE_SPEED = 300;
// Animation time when a row is being deleted
static DELETE_ROW_ANIMATION = 500;
// Score to add when a square dissapears (for each square)
static PER_SQUARE_SCORE = 1;
static COLORS = [
    "#ffd300",
    "#de38c8",
    "#652ec7",
    "#33135c",
    "#13ca91",
    "#ff9472",
    "#35212a",
    "#ff8b8b",
    "#28cf75",
    "#00a9fe",
    "#04005e",
    "#120052",
    "#272822",
    "#f92672",
    "#66d9ef",
    "#a6e22e",
    "#fd971f",
];
El arreglo de colores puede ser modificado a tu gusto, ya sea cambiando los colores o agregando más, para agregar aleatoridad.
También tenemos ciertos parámetros interesantes como el tamaño de cada cuadro en pixeles (esto afecta al tamaño del tablero) o los milisegundos para indicar la velocidad a la que la pieza baja, la duración de la animación o el tiempo que tiene el jugador para mover la pieza si la misma ha tocado el suelo.
Función init del juego
Todo comienza en la función init, pero también es importante el constructor en donde definimos varias cosas:
constructor(canvasId) {
    this.canvasId = canvasId;
    this.timeoutFlag = false;
    this.board = [];
    this.existingPieces = [];
    this.globalX = 0;
    this.globalY = 0;
    this.paused = true;
    this.currentFigure = null;
    this.sounds = {};
    this.canPlay = false;
    this.intervalId = null;
    this.init();
}
El juego recibe el id del canvas en donde se va a dibujar. De este modo podríamos hacer que sean dos tableros de juego de Tetris, usando el mismo código.
También tenemos varias banderas, la definición del tablero, los sonidos, etcétera. Ahora veamos el init y el reinicio de este juego de tetris open source:
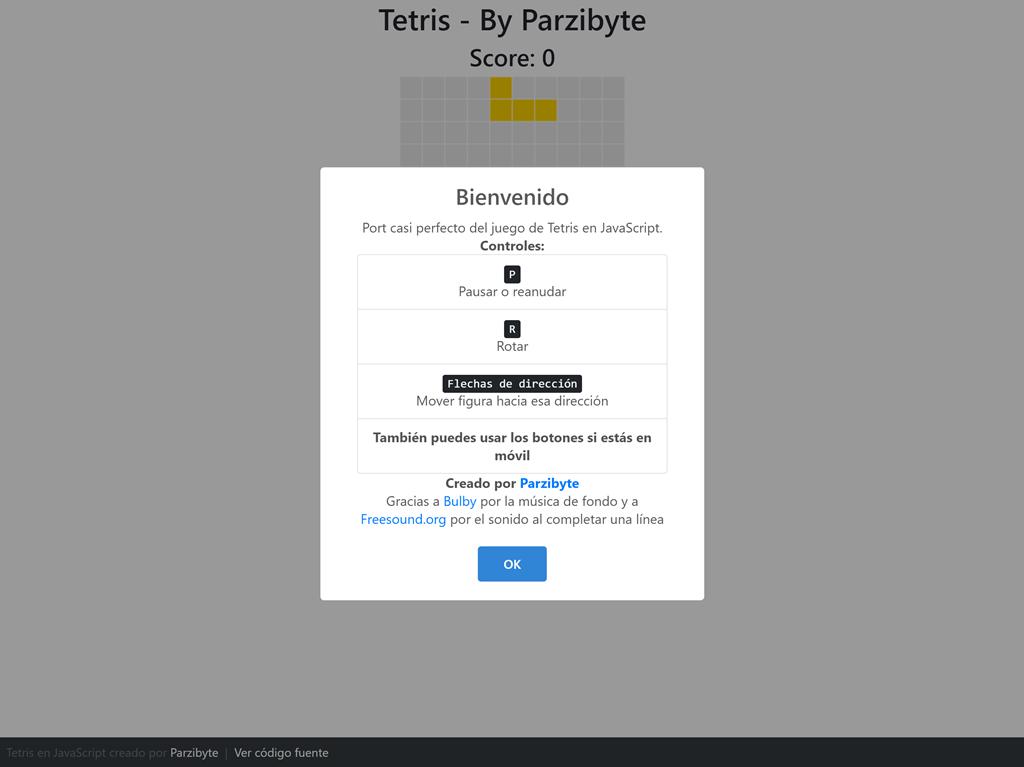
init() {
    this.showWelcome();
    this.initDomElements();
    this.initSounds();
    this.resetGame();
    this.draw();
    this.initControls();
}

resetGame() {
    this.score = 0;
    this.sounds.success.currentTime = 0;
    this.sounds.success.pause();
    this.sounds.background.currentTime = 0;
    this.sounds.background.pause();
    this.initBoardAndExistingPieces();
    this.chooseRandomFigure();
    this.restartGlobalXAndY();
    this.syncExistingPiecesWithBoard();
    this.refreshScore();
    this.pauseGame();
}
Aquí hay que notar una cosa importante y es la función syncExistingPiecesWithBoard. Lo que hace esta función es limpiar el tablero y colocar sobre el mismo (es decir, modificar los índices del arreglo) las piezas existentes.
Dibujar sobre canvas
La función que dibuja todo el juego de tetris en el canvas es la siguiente. La misma se estará invocando cada 17 milisegundos usando requestAnimationFrame:
draw() {
    let x = 0, y = 0;
    for (const row of this.board) {
        x = 0;
        for (const point of row) {
            this.canvasContext.fillStyle = point.color;
            this.canvasContext.fillRect(x, y, Game.SQUARE_LENGTH, Game.SQUARE_LENGTH);
            this.canvasContext.restore();
            this.canvasContext.strokeStyle = Game.BORDER_COLOR;
            this.canvasContext.strokeRect(x, y, Game.SQUARE_LENGTH, Game.SQUARE_LENGTH);
            x += Game.SQUARE_LENGTH;
        }
        y += Game.SQUARE_LENGTH;
    }
    setTimeout(() => {
        requestAnimationFrame(this.draw.bind(this));
    }, 17)
}
Esta función es la que puedes modificar si quieres dibujar el juego en otro lugar; por ejemplo en una tabla, con SVG, en la consola, etcétera.
Obtener figura aleatoria
Tenemos la función en donde definimos las figuras y sus rotaciones. Este método devolverá un Tetrominó aleatorio en cada invocación:
getRandomFigure() {
    /*
    * Nombres de los tetrominós tomados de: https://www.joe.co.uk/gaming/tetris-block-names-221127
    * Regresamos una nueva instancia en cada ocasión, pues si definiéramos las figuras en constantes o variables, se tomaría la misma
    * referencia en algunas ocasiones
    * */
    switch (Utils.getRandomNumberInRange(1, 7)) {
        case 1:
            /*
            El cuadrado (smashboy)

            **
            **
            */
            return new Tetromino([
                [new Point(0, 0), new Point(1, 0), new Point(0, 1), new Point(1, 1)]
            ]);
        case 2:

            /*
            La línea (hero)

            ****
            */
            return new Tetromino([
                [new Point(0, 0), new Point(1, 0), new Point(2, 0), new Point(3, 0)],
                [new Point(0, 0), new Point(0, 1), new Point(0, 2), new Point(0, 3)],
            ]);
        case 3:

            /*
            La L (orange ricky)
              *
            ***

            */

            return new Tetromino([
                [new Point(0, 1), new Point(1, 1), new Point(2, 1), new Point(2, 0)],
                [new Point(0, 0), new Point(0, 1), new Point(0, 2), new Point(1, 2)],
                [new Point(0, 0), new Point(0, 1), new Point(1, 0), new Point(2, 0)],
                [new Point(0, 0), new Point(1, 0), new Point(1, 1), new Point(1, 2)],
            ]);
        case 4:

            /*
            La J (blue ricky)
            *
            ***

            */

            return new Tetromino([
                [new Point(0, 0), new Point(0, 1), new Point(1, 1), new Point(2, 1)],
                [new Point(0, 0), new Point(1, 0), new Point(0, 1), new Point(0, 2)],
                [new Point(0, 0), new Point(1, 0), new Point(2, 0), new Point(2, 1)],
                [new Point(0, 2), new Point(1, 2), new Point(1, 1), new Point(1, 0)],
            ]);
        case 5:
            /*
           La Z (Cleveland Z)
           **
            **
           */

            return new Tetromino([
                [new Point(0, 0), new Point(1, 0), new Point(1, 1), new Point(2, 1)],
                [new Point(0, 1), new Point(1, 1), new Point(1, 0), new Point(0, 2)],
            ]);
        case 6:

            /*
           La otra Z (Rhode island Z)
            **
           **
           */
            return new Tetromino([
                [new Point(0, 1), new Point(1, 1), new Point(1, 0), new Point(2, 0)],
                [new Point(0, 0), new Point(0, 1), new Point(1, 1), new Point(1, 2)],
            ]);
        case 7:
        default:

            /*
           La T (Teewee)

            *
           ***
           */
            return new Tetromino([
                [new Point(0, 1), new Point(1, 1), new Point(1, 0), new Point(2, 1)],
                [new Point(0, 0), new Point(0, 1), new Point(0, 2), new Point(1, 1)],
                [new Point(0, 0), new Point(1, 0), new Point(2, 0), new Point(1, 1)],
                [new Point(0, 1), new Point(1, 0), new Point(1, 1), new Point(1, 2)],
            ]);
    }
}
Justo aquí es en donde estamos usando la clase Point y la clase Tetromino. Recuerda que cada Tetrominó recibirá un arreglo de todas las rotaciones posibles. Y cada rotación es a su vez un arreglo de puntos que tienen distintas coordenadas.
Estas coordenadas no se modifican internamente en el punto, sino que son colocadas a partir de un X e Y globales del tablero.
Si tú quieres definir otras figuras o modificar las rotaciones, justo aquí es en donde tienes que realizar los cambios.
Colisiones y movimientos
Sé que existen motores para el desarrollo de videojuegos pero en este caso quise hacerlo todo a mano. Por lo tanto he creado mis propias funciones para saber si un punto está fuera de los límites, si un punto es válido, etcétera.
Primero veamos las funciones de colisión de puntos que verifican el tablero y las piezas existentes:
/**
 *
 * @param point An object that has x and y properties; the coordinates shouldn't be global, but relative to the point
 * @returns {boolean}
 */
relativePointOutOfLimits(point) {
    const absoluteX = point.x + this.globalX;
    const absoluteY = point.y + this.globalY;
    return this.absolutePointOutOfLimits(absoluteX, absoluteY);
}

/**
 * @param absoluteX
 * @param absoluteY
 * @returns {boolean}
 */
absolutePointOutOfLimits(absoluteX, absoluteY) {
    return absoluteX < 0 || absoluteX > Game.COLUMNS - 1 || absoluteY < 0 || absoluteY > Game.ROWS - 1;
}

// It returns true even if the point is not valid (for example if it is out of limit, because it is not the function's responsibility)
isEmptyPoint(x, y) {
    if (!this.existingPieces[y]) return true;
    if (!this.existingPieces[y][x]) return true;
    if (this.existingPieces[y][x].taken) {
        return false;
    } else {
        return true;
    }
}

/**
 * Check if a point (in the game board) is valid to put another point there.
 * @param point the point to check, with relative coordinates
 * @param points an array of points that conforms a figure
 */
isValidPoint(point, points) {
    const emptyPoint = this.isEmptyPoint(this.globalX + point.x, this.globalY + point.y);
    const hasSameCoordinateOfFigurePoint = points.findIndex(p => {
        return p.x === point.x && p.y === point.y;
    }) !== -1;
    const outOfLimits = this.relativePointOutOfLimits(point);
    if ((emptyPoint || hasSameCoordinateOfFigurePoint) && !outOfLimits) {
        return true;
    } else {
        return false;
    }
}
Estamos usando las coordenadas globales de X y también las de Y, pues recuerda que cada punto de la figura es independiente.
Ahora veamos las funciones para mover o rotar la figura:
figureCanMoveRight() {
    if (!this.currentFigure) return false;
    for (const point of this.currentFigure.getPoints()) {
        const newPoint = new Point(point.x + 1, point.y);
        if (!this.isValidPoint(newPoint, this.currentFigure.getPoints())) {
            return false;
        }
    }
    return true;
}

figureCanMoveLeft() {
    if (!this.currentFigure) return false;
    for (const point of this.currentFigure.getPoints()) {
        const newPoint = new Point(point.x - 1, point.y);
        if (!this.isValidPoint(newPoint, this.currentFigure.getPoints())) {
            return false;
        }
    }
    return true;
}

figureCanMoveDown() {
    if (!this.currentFigure) return false;
    for (const point of this.currentFigure.getPoints()) {
        const newPoint = new Point(point.x, point.y + 1);
        if (!this.isValidPoint(newPoint, this.currentFigure.getPoints())) {
            return false;
        }
    }
    return true;
}

figureCanRotate() {
    const newPointsAfterRotate = this.currentFigure.getNextRotation();
    for (const rotatedPoint of newPointsAfterRotate) {
        if (!this.isValidPoint(rotatedPoint, this.currentFigure.getPoints())) {
            return false;
        }
    }
    return true;
}

rotateFigure() {
    if (!this.figureCanRotate()) {
        this.sounds.denied.currentTime = 0;
        this.sounds.denied.play();
        return;
    }
    this.currentFigure.points = this.currentFigure.getNextRotation();
    this.currentFigure.incrementRotationIndex();
}
Lo que hacemos es simular el movimiento y verificar si cada punto sigue siendo válido. También reproducimos un sonido en el caso de que la figura no se pueda rotar.
Eliminar filas
Esta es una de las funciones que más trabajo me tomó programar. Lo que hace es verificar y eliminar las filas llenas. Queda así:
verifyAndDeleteFullRows() {
    const yCoordinates = this.getPointsToDelete();
    if (yCoordinates.length <= 0) return;
    this.addScore(yCoordinates);
    this.sounds.success.currentTime = 0;
    this.sounds.success.play();
    this.changeDeletedRowColor(yCoordinates);
    this.canPlay = false;
    setTimeout(() => {
        this.sounds.success.pause();
        this.removeRowsFromExistingPieces(yCoordinates);
        this.syncExistingPiecesWithBoard();
        const invertedCoordinates = Array.from(yCoordinates);
        // Now the coordinates are in descending order
        invertedCoordinates.reverse();

        for (let coordenadaY of invertedCoordinates) {
            for (let y = Game.ROWS - 1; y >= 0; y--) {
                for (let x = 0; x < this.existingPieces[y].length; x++) {
                    if (y < coordenadaY) {
                        let contador = 0;
                        let yAuxiliar = y;
                        while (this.isEmptyPoint(x, yAuxiliar + 1) && !this.absolutePointOutOfLimits(x, yAuxiliar + 1) && contador < yCoordinates.length) {
                            this.existingPieces[yAuxiliar + 1][x] = this.existingPieces[yAuxiliar][x];
                            this.existingPieces[yAuxiliar][x] = {
                                color: Game.EMPTY_COLOR,
                                taken: false,
                            }

                            this.syncExistingPiecesWithBoard();
                            contador++;
                            yAuxiliar++;
                        }
                    }
                }
            }
        }

        this.syncExistingPiecesWithBoard()
        this.canPlay = true;
    }, Game.DELETE_ROW_ANIMATION);
}
Debemos obtener la coordenada Y de todas las filas que ya están llenas. Por cada una, verificamos si podemos mover todos los puntos hacia abajo. En caso de que sí, los bajamos, pero no los bajamos más allá de la cantidad de filas eliminadas.
Además, esta función aumenta el puntaje. La función que lo refresca es:
addScore(rows) {
    this.score += Game.PER_SQUARE_SCORE * Game.COLUMNS * rows.length;
    this.refreshScore();
}

refreshScore() {
    this.$score.textContent = `Score: ${this.score}`;
}
El puntaje se calcula de acuerdo a la cantidad de puntos que se eliminaron multiplicados por el puntaje por cuadro eliminado.
Loop: ciclo del juego
Ahora veamos el ciclo del juego. Según el intervalo en milisegundos definido anteriormente vamos bajando la pieza, mientras se pueda. En caso de que ya no se pueda mover la pieza, se inicia un temporizador para darle oportunidad al jugador de mover la pieza.
Cuando se acaba el temporizador, si la pieza sigue sin poder moverse, agregamos la pieza actual a las piezas existentes y luego seleccionamos otra figura:
mainLoop() {
if (!this.canPlay) {
return;
}
// If figure can move down, move down
if (this.figureCanMoveDown()) {
this.globalY++;
} else {
// If figure cannot, then we start a timeout because
// player can move figure to keep it going down
// for example when the figure collapses with another points but there's remaining
// space at the left or right and the player moves there so the figure can keep going down
if (this.timeoutFlag) return;
this.timeoutFlag = true;
setTimeout(() => {
this.timeoutFlag = false;
// If the time expires, we re-check if figure cannot keep going down. If it can
// (because player moved it) then we return and keep the loop
if (this.figureCanMoveDown()) {
return;
}
// At this point, we know that the figure collapsed either with the floor
// or with another point. So we move all the figure to the existing pieces array
this.sounds.tap.currentTime = 0;
this.sounds.tap.play();
this.moveFigurePointsToExistingPieces();
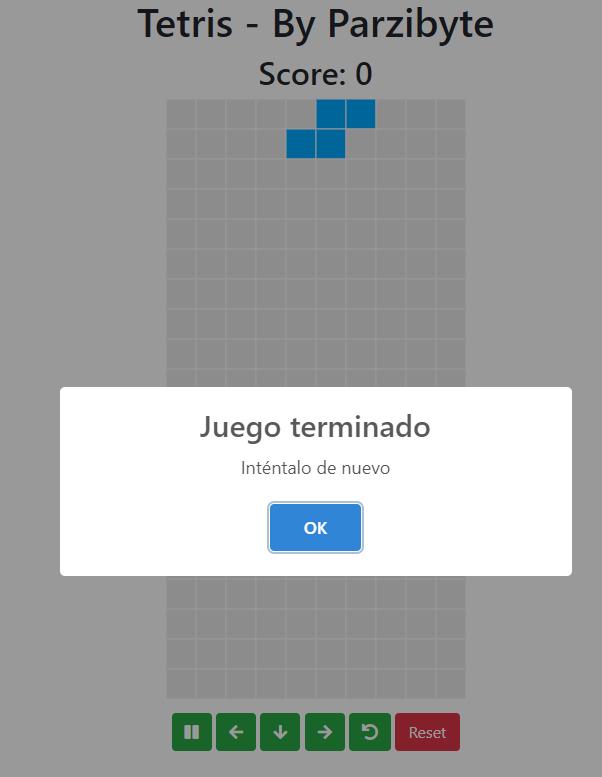
if (this.playerLoses()) {
Swal.fire("Juego terminado", "Inténtalo de nuevo");
this.sounds.background.pause();
this.canPlay = false;
this.resetGame();
return;
}
this.verifyAndDeleteFullRows();
this.chooseRandomFigure();
this.syncExistingPiecesWithBoard()
}, Game.TIMEOUT_LOCK_PUT_NEXT_PIECE);
}
this.syncExistingPiecesWithBoard();
}
También es en este ciclo en donde comprobamos si el jugador pierde.
Debo admitir que esa función debe ser mejorada, pues actualmente verifica si hay piezas en la segunda fila, pero debería ser más inteligente. Se me ocurre que puede verificar si puede colocar una figura aleatoria.
playerLoses() {
    // Check if there's something at Y 1. Maybe it is not fair for the player, but it works
    for (const point of this.existingPieces[1]) {
        if (point.taken) {
            return true;
        }
    }
    return false;
}
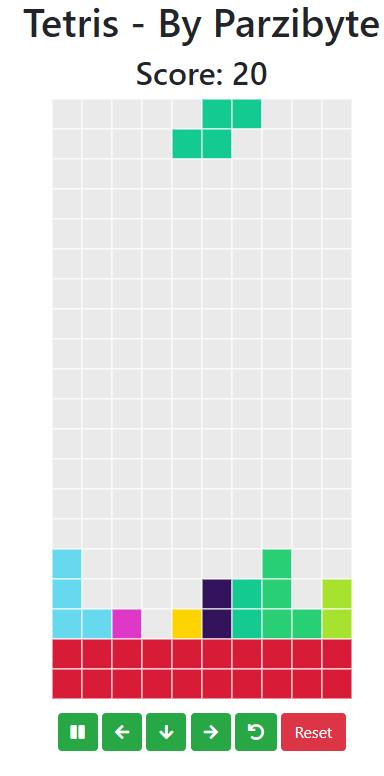
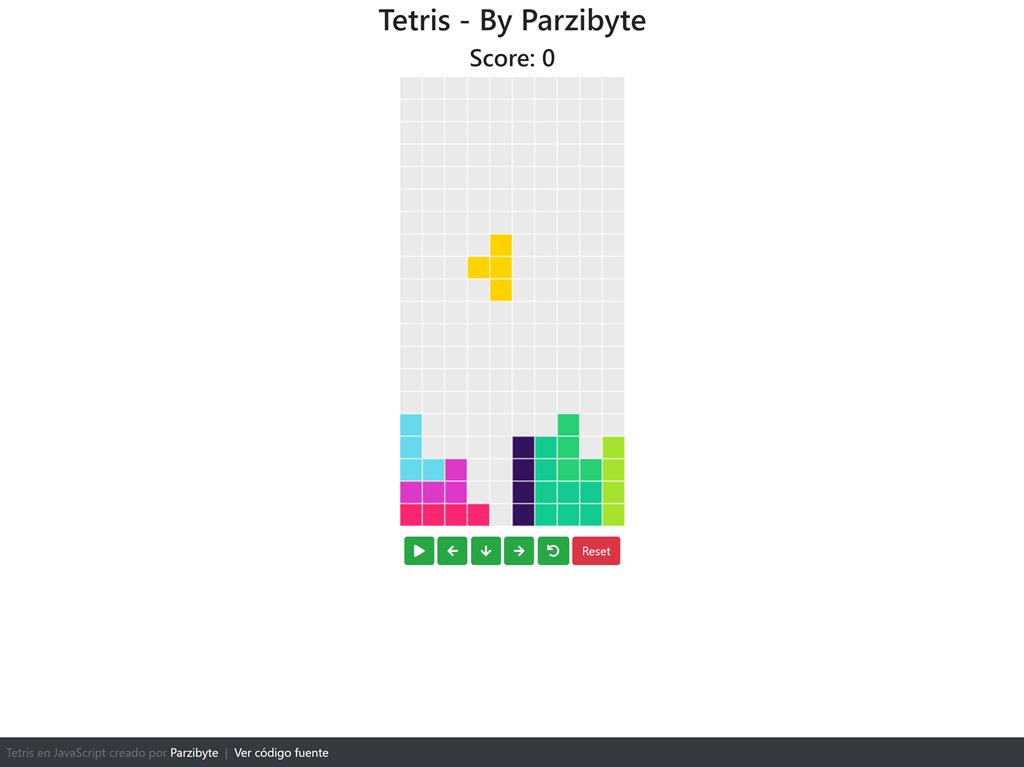
Controles para jugar bloques en JavaScript
El juego de bloques o tetris en JavaScript que he programado se puede jugar con el teclado o con los botones. Es buen momento para mostrar el código HTML del juego, en donde vemos al canvas y los botones:
<!DOCTYPE html>
<html lang="en">
<head>
<meta charset="UTF-8">
<meta name="viewport" content="width=device-width, initial-scale=1.0">
<link rel="stylesheet" href="css/bootstrap.min.css">
<link rel="stylesheet" href="css/all.min.css">
<style>
body {
padding-bottom: 70px;
}
</style>
<title>Tetris en JavaScript by Parzibyte - Jugar tetris en línea</title>
</head>
<body>
<main>
<div class="container-fluid">
<div class="row">
<div class="col-12 text-center">
<h1>Tetris - By Parzibyte</h1>
<h2 id="puntaje">Presiona <kbd>P</kbd> o pulsa el botón para comenzar</h2>
</div>
<div class="col-12 text-center">
<canvas id="canvas"></canvas>
</div>
<div class="col-12 text-center">
<div class="mt-2">
<button id="btnIniciar" class="btn btn-success"><i class="fas fa-play"></i></button>
<button hidden id="btnPausar" class="btn btn-success"><i class="fas fa-pause"></i></button>
<button id="btnIzquierda" class="btn btn-success"><i class="fas fa-arrow-left"></i></button>
<button id="btnAbajo" class="btn btn-success"><i class="fas fa-arrow-down"></i></button>
<button id="btnDerecha" class="btn btn-success"><i class="fas fa-arrow-right"></i></button>
<button id="btnRotar" class="btn btn-success"><i class="fas fa-undo"></i></button>
<button class="btn btn-danger" id="reset">Reset</button>
</div>
</div>
</div>
</div>
</main>
<footer class="px-2 py-2 fixed-bottom bg-dark">
<span class="text-muted">Tetris en JavaScript creado por
<a class="text-white" href="https://parzibyte.me/blog/">Parzibyte</a>
|
<a target="_blank" class="text-white" href="//github.com/parzibyte/tetris-javascript">
Ver código fuente
</a>
</span>
</footer>
</body>
<script src="js/sweetalert2.min.js"></script>
<script src="js/tetris.js"></script>
</html>
Cada botón tiene un id, que luego recupero dentro del juego usando querySelector:
initDomElements() {
    this.$canvas = document.querySelector("#" + this.canvasId);
    this.$score = document.querySelector("#puntaje");
    this.$btnPause = document.querySelector("#btnPausar");
    this.$btnResume = document.querySelector("#btnIniciar");
    this.$btnRotate = document.querySelector("#btnRotar");
    this.$btnDown = document.querySelector("#btnAbajo");
    this.$btnRight = document.querySelector("#btnDerecha");
    this.$btnLeft = document.querySelector("#btnIzquierda");
    this.$canvas.setAttribute("width", Game.CANVAS_WIDTH + "px");
    this.$canvas.setAttribute("height", Game.CANVAS_HEIGHT + "px");
    this.canvasContext = this.$canvas.getContext("2d");
}
Ahora veamos los controles, tanto del teclado como de los botones. Cada uno invoca a las funciones “intentar mover a la derecha” y a todas las demás posiciones:
initControls() {
    document.addEventListener("keydown", (e) => {
        const {code} = e;
        if (!this.canPlay && code !== "KeyP") {
            return;
        }
        switch (code) {
            case "ArrowRight":
                this.attemptMoveRight();
                break;
            case "ArrowLeft":
                this.attemptMoveLeft();
                break;
            case "ArrowDown":
                this.attemptMoveDown();
                break;
            case "KeyR":
                this.attemptRotate();
                break;
            case "KeyP":
                this.pauseOrResumeGame();
                break;
        }
        this.syncExistingPiecesWithBoard();
    });

    this.$btnDown.addEventListener("click", () => {
        if (!this.canPlay) return;
        this.attemptMoveDown();
    });
    this.$btnRight.addEventListener("click", () => {
        if (!this.canPlay) return;
        this.attemptMoveRight();
    });
    this.$btnLeft.addEventListener("click", () => {
        if (!this.canPlay) return;
        this.attemptMoveLeft();
    });
    this.$btnRotate.addEventListener("click", () => {
        if (!this.canPlay) return;
        this.attemptRotate();
    });
    [this.$btnPause, this.$btnResume].forEach($btn => $btn.addEventListener("click", () => {
        this.pauseOrResumeGame();
    }));
}
Aquí puedes ver que usamos la bandera canPlay, misma que desactivamos o activamos según nuestra conveniencia. Por ejemplo, no se puede jugar mientras el juego está en pausa o mientras se está reproduciendo la animación de la eliminación de las filas.
Poniendo todo junto
No puedo colocar ni explicar todo el código aquí. Recuerda que lo único que necesitamos es un canvas en donde dibujar todo el juego de bloques. Lo demás se encuentra en el código, sobre todo en la clase Game. Eres libre de explorarlo.
Realmente me llevó bastante tiempo y esfuerzo hacer este juego; puedes ver toda su evolución a través de los commits.
Te dejo un vídeo de YouTube para la demostración:
El código completo y open source está en mi GitHub.
Puedes probar la demostración aquí: https://parzibyte.github.io/tetris-javascript/
También aprovecho para invitarte a leer más sobre JavaScript y Videojuegos en mi blog.
Tetris en C con Allegro 5
En octubre de 2025 terminé de programar Tetris escrito en C usando Allegro 5, puedes revisarlo para encontrar una versión que también es compatible con Arduino y una pantalla OLED.