En este post sobre la tarjeta NodeMCU ESP8266 te mostraré cómo hacer una petición HTTP a un servidor web. Esto servirá para, por ejemplo, enviar datos de un sensor a un servidor web propio.
En este ejemplo te voy a mostrar cómo enviar datos desde una ESP8266 a un servidor Apache con PHP, pues es de las pilas de desarrollo más usadas, pero recuerda que podrías hacer esto con cualquier lenguaje por ejemplo usando Python y Flask o Go, etcétera.
Veamos entonces cómo comunicar la tarjeta con nuestro servidor, pues la misma ya tiene conexión WiFi así que podemos conectarla fácilmente. Vamos a hacer que nuestra ESP8266 sea un cliente HTTP, pues anteriormente ya vimos cómo hacer que sea un servidor.
Preparando el código del servidor
Como lo dije, vamos a usar PHP y Apache así que debes configurar tu entorno ya sea en Windows o Linux.
Lo que haremos será recibir los valores que nos va a enviar la tarjeta. El primer ejemplo es con GET:
<?php
$value = $_GET["value"];
$another_value = $_GET["another_value"];

# Prepare the data
$date = date("Y-m-d H:i:s");
$data = sprintf("On %s the value is %s and another_value is %s\n", $date, $value, $another_value);
# Save it
file_put_contents("data.txt", $data, FILE_APPEND);

# And we need to answer the client. We just tell the date ;)
echo $date;
Como puedes ver, estamos recibiendo los valores por GET y guardándolos en un archivo con la función file_put_contents. Además, estamos respondiendo con la fecha y hora actual.
En este caso tú podrías guardar los valores en una base de datos o responder al cliente NodeMCU ESP8266 con otros valores ya sea sacados de una base de datos o de un archivo.
También existe otro ejemplo en donde se usa JSON y se hace una petición POST desde la tarjeta. Para ello el código queda así:
<?php
$data = json_decode(file_get_contents("php://input"));
# Prepare the data
$date = date("Y-m-d H:i:s");
$value = $data->value;
$another_value = $data->another_value;
$data = sprintf("On %s the data is %s and another_value is %s\n", $date, $value, $another_value);
# Save it
file_put_contents("data_post.txt", $data, FILE_APPEND);

# And we need to answer the client. We just tell the date ;)
echo $date;
De este modo nuestro servidor queda preparado. Por cierto, es importante que conozcas la IP de tu computadora dentro de tu red local en caso de que no subas tu proyecto a internet. También es necesario que tengas una red WiFi pues a ella se conectará la tarjeta.
En mi caso mi IP es 192.168.1.77 y he montado el proyecto en la carpeta llamada esp8266_api.
Librerías necesarias
En este caso necesitamos la librería WifiManager de tzapu y también la librería ESP8266HTTPClient de Markus Sattler que ya viene preinstalada.
Hacer petición GET con ESP8266
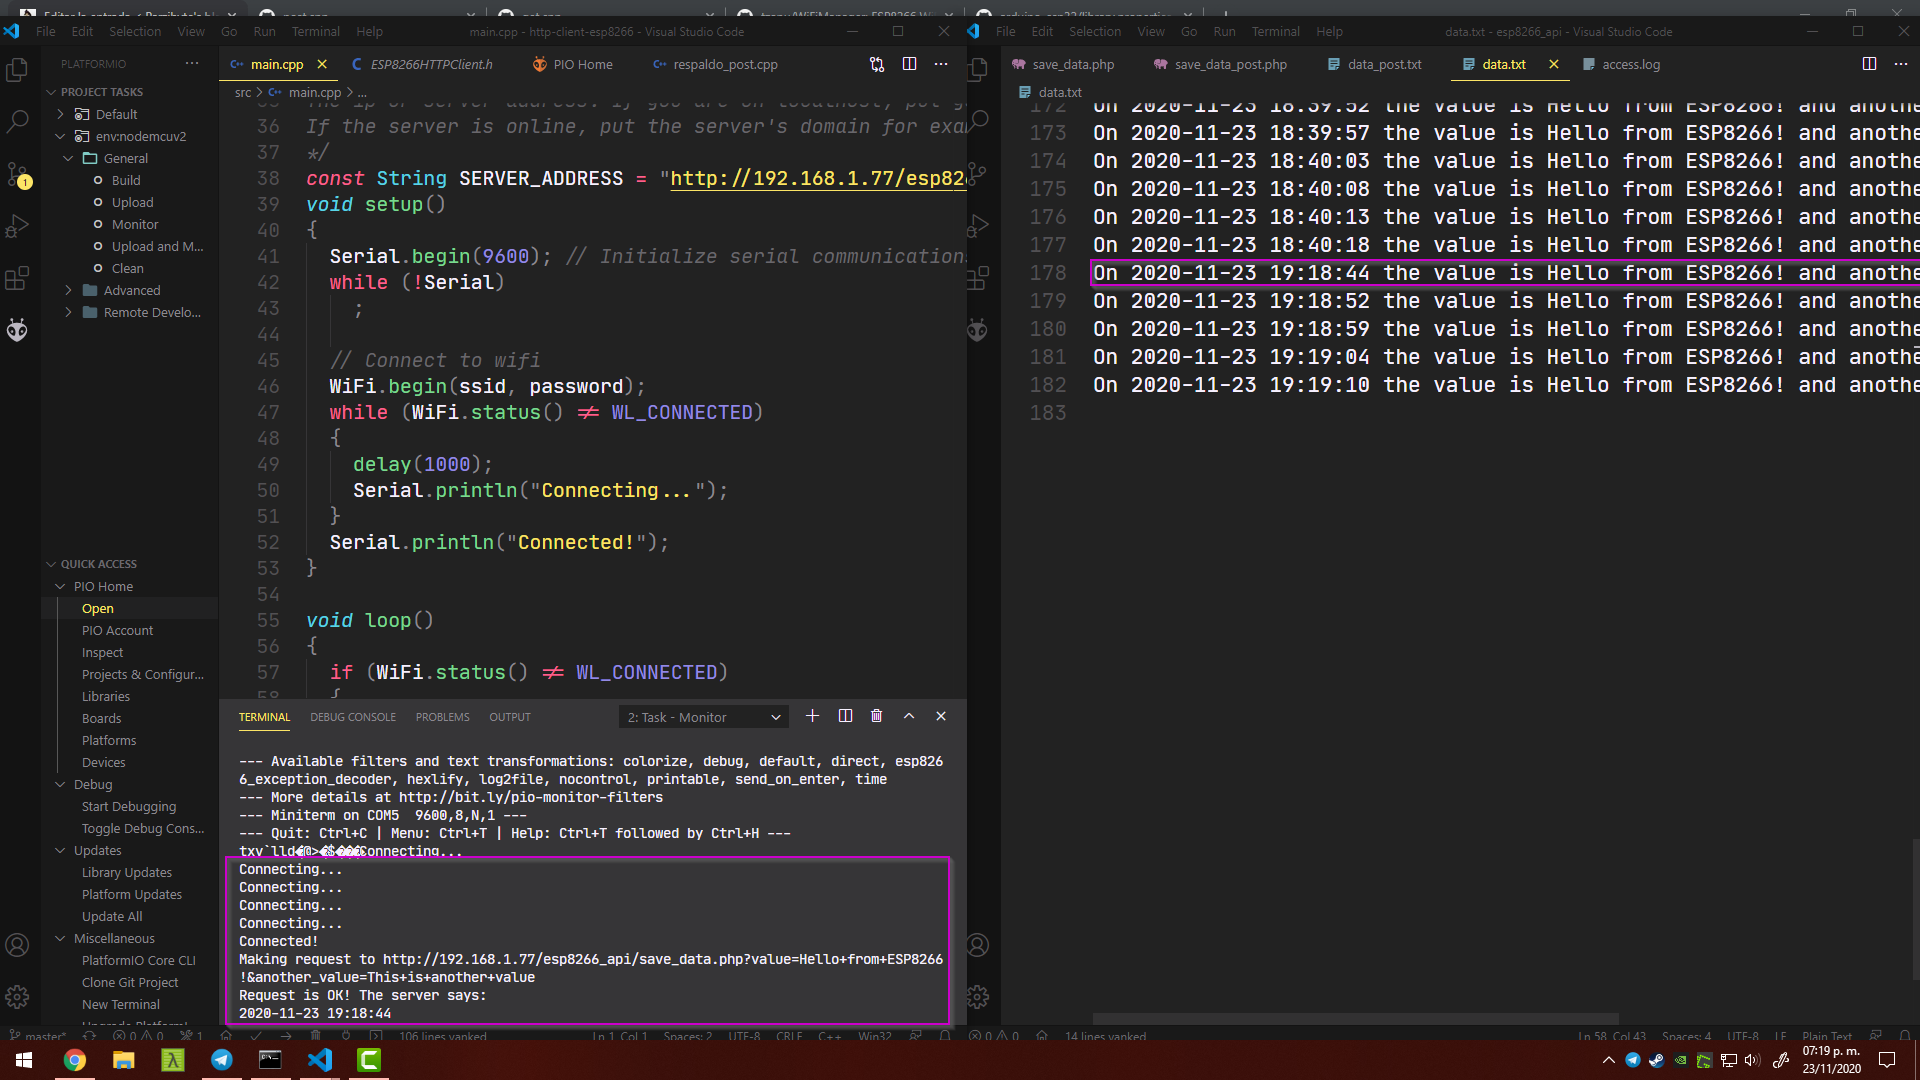
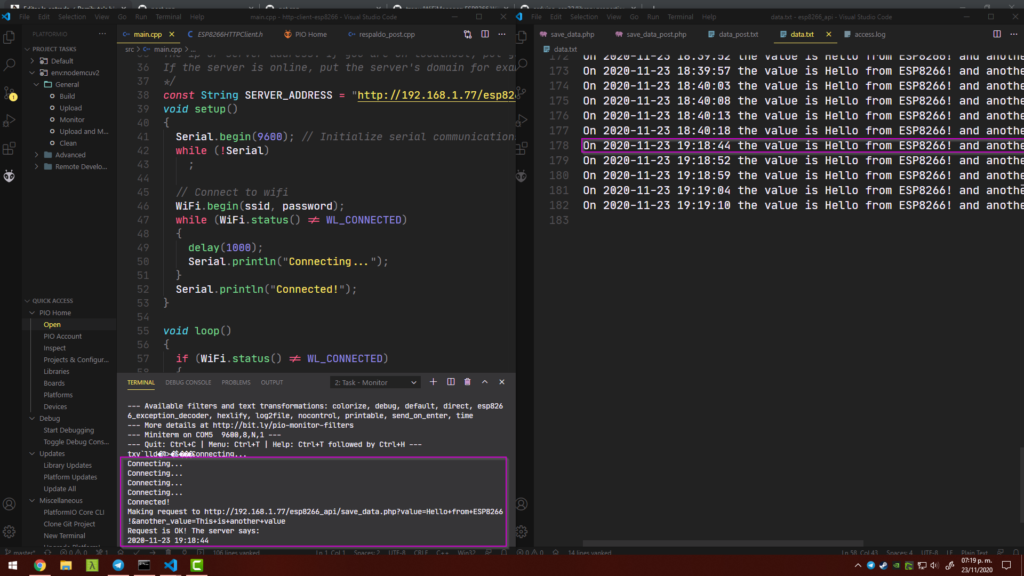
Veamos cómo hacer una petición GET. En este caso vamos a usar el Serial para depurar, pero en la práctica puede que quieras deshabilitarlo y eliminar todas las llamadas al mismo.
Iniciamos el Serial y también el WiFi. Luego iniciamos un cliente HTTP e invocamos al método GET. Fíjate en la URL pues a través de ella estamos enviando los valores:
/*
  ____          _____               _ _           _
 |  _ \        |  __ \             (_) |         | |
 | |_) |_   _  | |__) |_ _ _ __ _____| |__  _   _| |_ ___
 |  _ <| | | | |  ___/ _` | '__|_  / | '_ \| | | | __/ _ \
 | |_) | |_| | | |  | (_| | |   / /| | |_) | |_| | ||  __/
 |____/ \__, | |_|   \__,_|_|  /___|_|_.__/ \__, |\__\___|
         __/ |                               __/ |
        |___/                               |___/

____________________________________
/ Si necesitas ayuda, contáctame en \
\ https://parzibyte.me               /
 ------------------------------------
        \   ^__^
         \  (oo)\_______
            (__)\       )\/\
                ||----w |
                ||     ||
Creado por Parzibyte (https://parzibyte.me).
------------------------------------------------------------------------------------------------
Si el código es útil para ti, puedes agradecerme siguiéndome: https://parzibyte.me/blog/sigueme/
Y compartiendo mi blog con tus amigos
También tengo canal de YouTube: https://www.youtube.com/channel/UCroP4BTWjfM0CkGB6AFUoBg?sub_confirmation=1
------------------------------------------------------------------------------------------------
*/
#include <Arduino.h>
#include <ESP8266WiFi.h>
#include <ESP8266HTTPClient.h>

// Credentials to connect to the wifi network
const char *ssid = "YOUR_SSID";
const char *password = "YOUR_PASSWORD";
/*
The ip or server address. If you are on localhost, put your computer's IP (for example http://192.168.1.65)
If the server is online, put the server's domain for example https://parzibyte.me
*/
const String SERVER_ADDRESS = "http://192.168.1.77/esp8266_api";
void setup()
{
  Serial.begin(9600); // Initialize serial communications with the PC. Just for debug
  while (!Serial)
    ;

  // Connect to wifi
  WiFi.begin(ssid, password);
  while (WiFi.status() != WL_CONNECTED)
  {
    delay(1000);
    Serial.println("Connecting...");
  }
  Serial.println("Connected!");
}

void loop()
{
  if (WiFi.status() != WL_CONNECTED)
  {
    Serial.println("Wifi is unavailable");
    return;
  }
  // Make request each 5 seconds

  HTTPClient http;


  // This value can come from a sensor
  String value = "Hello+from+ESP8266!";
  String another_value = "This+is+another+value";
  String full_url = SERVER_ADDRESS + "/save_data.php?value=" + value + "&another_value=" + another_value;
  http.begin(full_url);

  // Make request
  Serial.println("Making request to " + full_url);
  int httpCode = http.GET();
  if (httpCode > 0)
  {
    if (httpCode == HTTP_CODE_OK)
    {

      String payload = http.getString(); //Get the request response payload
      Serial.println("Request is OK! The server says: ");
      Serial.println(payload);
    }
    else
    {
      Serial.println("Error: httpCode was " + http.errorToString(httpCode));
    }
  }
  else
  {
    Serial.println("Request failed: " + http.errorToString(httpCode));
  }

  http.end(); //Close connection
  // And wait 5 seconds
  delay(5000);
}
La petición está en la línea 75, y la declaración de los valores está en la línea 68. Además, si la petición es correcta imprimimos lo que el servidor haya respondido en la línea 83.
Esto es importante de mencionar porque si por ejemplo quieres realizar cierta acción en la tarjeta (encender un LED, imprimir en una LCD, etcétera) puedes comparar esta respuesta del payload para realizar determinada acción.
Petición HTTP POST con ESP8266
Ahora veamos cómo hacer una petición POST. En este caso enviaremos un JSON codificado, pero lo vamos a codificar a mano. Yo te recomiendo que si los datos no son sensibles, los envíes por GET.
De igual modo estoy seguro de que ya debe haber una librería para codificar a JSON en C++ específicamente para esta tarjeta, pero para ahorrar cosas vamos a codificar “a mano”.
El código completo queda como se ve a continuación, lo único que cambia es que ya no enviamos los valores en la URL y que invocamos a http.post pasándole los valores JSON, en lugar de http.get.
/*
  ____          _____               _ _           _
 |  _ \        |  __ \             (_) |         | |
 | |_) |_   _  | |__) |_ _ _ __ _____| |__  _   _| |_ ___
 |  _ <| | | | |  ___/ _` | '__|_  / | '_ \| | | | __/ _ \
 | |_) | |_| | | |  | (_| | |   / /| | |_) | |_| | ||  __/
 |____/ \__, | |_|   \__,_|_|  /___|_|_.__/ \__, |\__\___|
         __/ |                               __/ |
        |___/                               |___/

____________________________________
/ Si necesitas ayuda, contáctame en \
\ https://parzibyte.me               /
 ------------------------------------
        \   ^__^
         \  (oo)\_______
            (__)\       )\/\
                ||----w |
                ||     ||
Creado por Parzibyte (https://parzibyte.me).
------------------------------------------------------------------------------------------------
Si el código es útil para ti, puedes agradecerme siguiéndome: https://parzibyte.me/blog/sigueme/
Y compartiendo mi blog con tus amigos
También tengo canal de YouTube: https://www.youtube.com/channel/UCroP4BTWjfM0CkGB6AFUoBg?sub_confirmation=1
------------------------------------------------------------------------------------------------
*/
#include <Arduino.h>
#include <ESP8266WiFi.h>
#include <ESP8266HTTPClient.h>

// Credentials to connect to the wifi network
const char *ssid = "YOUR_SSID";
const char *password = "YOUR_PASSWORD";
/*
The ip or server address. If you are on localhost, put your computer's IP (for example http://192.168.1.65)
If the server is online, put the server's domain for example https://parzibyte.me
*/
const String SERVER_ADDRESS = "http://192.168.1.77/esp8266_api";
void setup()
{
  Serial.begin(9600); // Initialize serial communications with the PC. Just for debug
  while (!Serial)
    ;

  // Connect to wifi
  WiFi.begin(ssid, password);
  while (WiFi.status() != WL_CONNECTED)
  {
    delay(1000);
    Serial.println("Connecting...");
  }
  Serial.println("Connected!");
}

void loop()
{
  if (WiFi.status() != WL_CONNECTED)
  {
    Serial.println("Wifi is unavailable");
    return;
  }
  // Make request each 5 seconds

  HTTPClient http;
  WiFiClient client;

  // This value can come from a sensor
  String value = "Hello. This is a post request";
  String another_value = "Hello world! :)";
  String full_url = SERVER_ADDRESS + "/save_data_post.php";
  http.begin(client, full_url);

  // Make request
  Serial.println("Making request to " + full_url);
  // We send the data in JSON format. Something like:
  /*
  {"value":"some_value","another_value":"another_value"}
  */
  int httpCode = http.POST(
      "{\"value\":\"" + value + "\"" +
      ",\"another_value\":\"" +
      another_value + "\"" +
      "}");
  if (httpCode > 0)
  {
    if (httpCode == HTTP_CODE_OK)
    {

      String payload = http.getString(); //Get the request response payload
      Serial.println("Request is OK! The server says: ");
      Serial.println(payload);
    }
    else
    {
      Serial.println("Error: httpCode was " + http.errorToString(httpCode));
    }
  }
  else
  {
    Serial.println("Request failed: " + http.errorToString(httpCode));
  }

  http.end(); //Close connection
  // And wait 5 seconds
  delay(5000);
}
El envío de datos está en la línea 79; como lo dije, puede que sea un poco complejo de entender pero es para evitar incluir librerías de codificación a JSON.
Al hacer la petición vemos que igualmente se están guardando los datos, solo que ahora no necesitamos codificarlos para una URL.
Recuerda que con JSON podemos codificar más que una simple cadena, podemos enviar un arreglo, un objeto dentro de un objeto, números, etcétera.
Poniendo todo junto
El código completo lo dejaré en GitHub. Recuerda que el del servidor lo debes colocar en htdocs o en /var/www/public_html dependiendo de tu sistema operativo e instalación.
Más adelante traeré otros ejemplos de esta tarjeta, mientras tanto te dejo más sobre programación en ESP8266, Electrónica y PHP.

Buen material, me sirvió mucho dado que soy novato en esto, gracias por tu tiempo !!
Excelente post. Uso un servidor en NODEJS y el body llega vacio.
Hola. Si tiene alguna consulta puede hacérmela llegar en https://parzibyte.me/#contacto
Saludos!