En este post te enseñaré a usar Flutter con SQLite en varias plataformas, excepto la web. El paquete oficial soporta solo Android, iOS y MacOS, pero no Windows ni Linux.
Aquí veremos cómo usar SQLite con Flutter en Android, iOS, MacOS, Windows y Linux usando un paquete adicional llamado sqflite_ffi que es compatible con Linux y Windows.
Nota: si tú solo quieres usar SQLite en Android, iOS o MacOS entonces tal vez quieras buscar un tutorial más simple como este, ya que aquí enseño a cómo tener SQLite en la mayor cantidad de plataformas posibles.
Agregando dependencias
Primero puse las dependencias sqlite y path en dependencies:
dependencies:
  flutter:
    sdk: flutter
  sqflite:
  path:
Siguiendo las instrucciones de sqflite_ffi https://github.com/tekartik/sqflite/blob/master/sqflite_common_ffi/doc/using_ffi_instead_of_sqflite.md agregué sqflite_common_ffi a las dev_dependencies:
dev_dependencies:
  flutter_test:
    sdk: flutter
  sqflite_common_ffi:
Por el momento no sé cuál es la diferencia entre las dev_dependencies y dependencies específicamente en Flutter, ya que al mover sqflite_common_ffi me dio algunos problemas en Windows y lo dejé en dev_dependencies.
Ejemplo
Yo te mostraré un ejemplo muy sucio y poco optimizado, pero que te mostrará cómo trabajar con SQLite en varias plataformas con Flutter.
Estoy importando las siguientes librerías:
import 'dart:io';
import 'package:flutter/material.dart';
import 'package:path/path.dart';
import 'package:sqflite_common_ffi/sqflite_ffi.dart';
import 'package:sqflite/sqflite.dart';
Y en la función que obtiene la base de datos estoy comprobando si estoy en Windows o Linux para invocar a sqfliteFfiInit(); además de invocar a openDatabase según la plataforma.
Fíjate en que al final obtendremos una variable de tipo Database, así que más adelante podríamos tener una función que obtiene la base de datos sin importar plataforma:
Database db;
if (Platform.isWindows || Platform.isLinux) {
  // Initialize FFI
  sqfliteFfiInit();
  var databaseFactory = databaseFactoryFfi;
  db = await databaseFactory.openDatabase(join(".", "ejemplo.db"));
} else {
  db = await openDatabase(
    // Set the path to the database. Note: Using the `join` function from the
    // `path` package is best practice to ensure the path is correctly
    // constructed for each platform.
    join(await getDatabasesPath(), 'ejemplo.db'),
    // When the database is first created, create a table to store dogs.
    onCreate: (db, version) {
      // Run the CREATE TABLE statement on the database.
    },
    // Set the version. This executes the onCreate function and provides a
    // path to perform database upgrades and downgrades.
    version: 1,
  );
}
Te repito que es un ejemplo muy sucio, modificado de otros ejemplos y todo eso. Lo que quiero que notes es que estamos comprobando en cuál plataforma estamos y además obteniendo la ruta de las bases de datos.
En Windows y Linux no existirá getDatabasesPath así que simplemente utilizo el directorio actual, pero como en iOS y Android sí existe entonces debo invocar a esa función.
Obviamente falta optimizar, poner constantes y todo eso. Para probar usé el siguiente código que de nuevo es copiado de por ahí:
await db.execute('''
CREATE TABLE IF NOT EXISTS Product (
  id INTEGER PRIMARY KEY,
  title TEXT
)
''');
await db.insert('Product', <String, Object?>{'title': 'Product 1'});
await db.insert('Product', <String, Object?>{'title': 'Product 1'});

var result = await db.query('Product');

print(result);
// prints [{id: 1, title: Product 1}, {id: 2, title: Product 1}]
await db.close();
En este caso estoy creando la tabla (cosa que debería ser en el onCreate, pero te repito que es un ejemplo), insertando, obteniendo e imprimiendo resultados de la consulta.
Código completo
Te mostraré mi main.dart que tiene la función que prueba a SQLite y además una función que se invoca al presionar el botón y que muestra los resultados de la consulta en un SnackBar:
import 'dart:io';
import 'package:flutter/material.dart';
import 'package:path/path.dart';
import 'package:sqflite_common_ffi/sqflite_ffi.dart';
import 'package:sqflite/sqflite.dart';

void main() {
  runApp(const MyApp());
}

class MyApp extends StatelessWidget {
  const MyApp({super.key});

  // This widget is the root of your application.
  @override
  Widget build(BuildContext context) {
    return MaterialApp(
      title: 'Flutter Demo',
      theme: ThemeData(
        // This is the theme of your application.
        //
        // Try running your application with "flutter run". You'll see the
        // application has a blue toolbar. Then, without quitting the app, try
        // changing the primarySwatch below to Colors.green and then invoke
        // "hot reload" (press "r" in the console where you ran "flutter run",
        // or simply save your changes to "hot reload" in a Flutter IDE).
        // Notice that the counter didn't reset back to zero; the application
        // is not restarted.
        primarySwatch: Colors.blue,
      ),
      home: const MyHomePage(title: 'Flutter Demo Home Page'),
    );
  }
}

class MyHomePage extends StatefulWidget {
  const MyHomePage({super.key, required this.title});

  // This widget is the home page of your application. It is stateful, meaning
  // that it has a State object (defined below) that contains fields that affect
  // how it looks.

  // This class is the configuration for the state. It holds the values (in this
  // case the title) provided by the parent (in this case the App widget) and
  // used by the build method of the State. Fields in a Widget subclass are
  // always marked "final".

  final String title;

  @override
  State<MyHomePage> createState() => _MyHomePageState();
}

class _MyHomePageState extends State<MyHomePage> {
  int _counter = 0;

  void testSqlite() async {
    Database db;
    if (Platform.isWindows || Platform.isLinux) {
      // Initialize FFI
      sqfliteFfiInit();
      var databaseFactory = databaseFactoryFfi;
      db = await databaseFactory.openDatabase(join(".", "ejemplo.db"));
    } else {
      db = await openDatabase(
        // Set the path to the database. Note: Using the `join` function from the
        // `path` package is best practice to ensure the path is correctly
        // constructed for each platform.
        join(await getDatabasesPath(), 'ejemplo.db'),
        // When the database is first created, create a table to store dogs.
        onCreate: (db, version) {
          // Run the CREATE TABLE statement on the database.
        },
        // Set the version. This executes the onCreate function and provides a
        // path to perform database upgrades and downgrades.
        version: 1,
      );
    }

    await db.execute('''
  CREATE TABLE IF NOT EXISTS Product (
      id INTEGER PRIMARY KEY,
      title TEXT
  )
  ''');
    await db.insert('Product', <String, Object?>{'title': 'Product 1'});
    await db.insert('Product', <String, Object?>{'title': 'Product 1'});

    var result = await db.query('Product');

    print(result);
    // prints [{id: 1, title: Product 1}, {id: 2, title: Product 1}]
    await db.close();
  }

  void _incrementCounter() {
    setState(() {
      // This call to setState tells the Flutter framework that something has
      // changed in this State, which causes it to rerun the build method below
      // so that the display can reflect the updated values. If we changed
      // _counter without calling setState(), then the build method would not be
      // called again, and so nothing would appear to happen.
      _counter++;
    });
  }

  @override
  Widget build(BuildContext context) {
    // This method is rerun every time setState is called, for instance as done
    // by the _incrementCounter method above.
    //
    // The Flutter framework has been optimized to make rerunning build methods
    // fast, so that you can just rebuild anything that needs updating rather
    // than having to individually change instances of widgets.
    return Scaffold(
      appBar: AppBar(
        // Here we take the value from the MyHomePage object that was created by
        // the App.build method, and use it to set our appbar title.
        title: Text(widget.title),
      ),
      body: Center(
        // Center is a layout widget. It takes a single child and positions it
        // in the middle of the parent.
        child: Column(
          // Column is also a layout widget. It takes a list of children and
          // arranges them vertically. By default, it sizes itself to fit its
          // children horizontally, and tries to be as tall as its parent.
          //
          // Invoke "debug painting" (press "p" in the console, choose the
          // "Toggle Debug Paint" action from the Flutter Inspector in Android
          // Studio, or the "Toggle Debug Paint" command in Visual Studio Code)
          // to see the wireframe for each widget.
          //
          // Column has various properties to control how it sizes itself and
          // how it positions its children. Here we use mainAxisAlignment to
          // center the children vertically; the main axis here is the vertical
          // axis because Columns are vertical (the cross axis would be
          // horizontal).
          mainAxisAlignment: MainAxisAlignment.center,
          children: <Widget>[
            const Text(
              'You have pushed the button this many times:',
            ),
            Text(
              '$_counter',
              style: Theme.of(context).textTheme.headline4,
            ),
          ],
        ),
      ),
      floatingActionButton: FloatingActionButton(
        onPressed: () async {
          Database db;
          if (Platform.isWindows || Platform.isLinux) {
            // Initialize FFI
            sqfliteFfiInit();
            var databaseFactory = databaseFactoryFfi;
            db = await databaseFactory.openDatabase(join(".", "ejemplo.db"));
          } else {
            db = await openDatabase(
              // Set the path to the database. Note: Using the `join` function from the
              // `path` package is best practice to ensure the path is correctly
              // constructed for each platform.
              join(await getDatabasesPath(), 'ejemplo.db'),
              // When the database is first created, create a table to store dogs.
              onCreate: (db, version) {
                // Run the CREATE TABLE statement on the database.
              },
              // Set the version. This executes the onCreate function and provides a
              // path to perform database upgrades and downgrades.
              version: 1,
            );
          }

          await db.execute('''
  CREATE TABLE IF NOT EXISTS Product (
      id INTEGER PRIMARY KEY,
      title TEXT
  )
  ''');
          await db.insert('Product', <String, Object?>{'title': 'Product 1'});
          await db.insert('Product', <String, Object?>{'title': 'Product 1'});

          var result = await db.query('Product');
          ScaffoldMessenger.of(context)
              .showSnackBar(SnackBar(content: Text(result.toString())));

          print(result);
          // prints [{id: 1, title: Product 1}, {id: 2, title: Product 1}]
          await db.close();
        },
        tooltip: 'Increment',
        child: const Icon(Icons.add),
      ), // This trailing comma makes auto-formatting nicer for build methods.
    );
  }
}
Fíjate a partir de la línea 152.
Compilando para producción
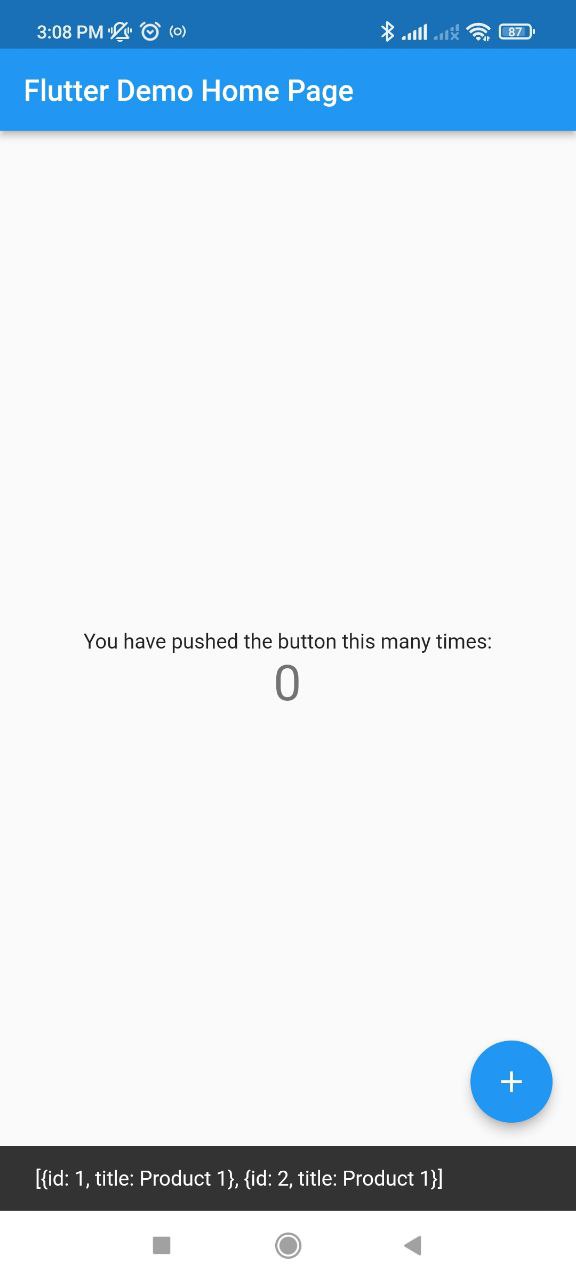
Para probar que todo funcione, yo compilé para Windows y para Android. En Android no tuve ningún problema y todo funcionó perfectamente:
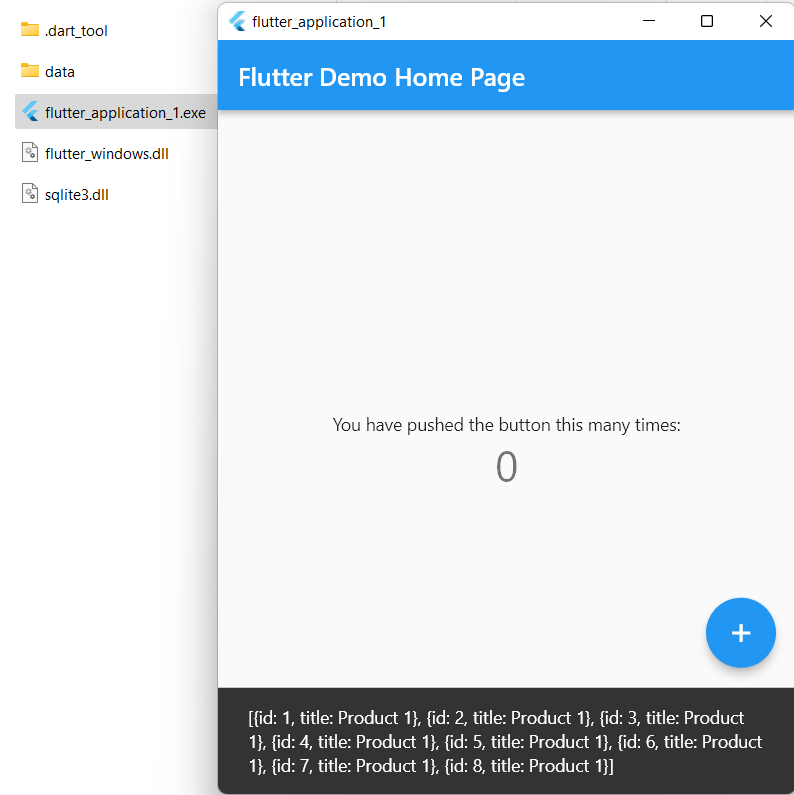
En Windows primero no funcionaba pero es porque hay que colocar y distribuir el DLL de SQLite junto con el ejecutable.
Lo descargué de https://www.sqlite.org/download.html, el zip sqlite-dll-win64-x64-3390300.zip y extrajo sqlite3.dll. Obviamente en el futuro aparecerán actualizaciones.
Lo único en lo que me quedan dudas es en la versión, no sé cuál versión utiliza el paquete, pero me imagino que basta con tener la última versión.
Nota: el archivo SQLite se crea dentro de .dart_tool\sqflite_common_ffi\databases.
Poniendo todo junto
Te dejo los programas de prueba (Android y Windows) en el repositorio de GitHub junto con el código completo para que puedas probar y descargar las demostraciones.
Para terminar te dejo con más tutoriales de Flutter en mi blog.
