Summary: In this post I will show you how to print readable QR codes on a thermal printer (also called ticket printer, pos printer, etc.) using JavaScript and a plugin.
If you have followed my posts, you will know that a long time ago I developed a plugin and I have added new features, until today we print QR codes on a thermal printer.
Some time ago I showed you how to print a ticket /receipt directly from browser, today we will use it to print a QR code.
Print QR codes on a thermal printer
The process is simple, but I recommend to try the hello world example first:
https://parzibyte.me/blog/en/posts/print-ticket-in-thermal-printer-directly-from-browser/
Download the plugin and run it, remember to give it permissions if required. It will be executed in the background.
Then install your printer and make sure it is shared.
Now open an HTML document, include the script and then in another script create a ConectorPluginV3 object like this:
const imprimirQr = async (nombreImpresora) => {
const contenido = "Soy el contenido de un QR. Visita parzibyte.me";
if (!contenido) {
return alert("Escribe el contenido del QR");
}
const conector = new ConectorPluginV3(URLPlugin);
conector.Iniciar();
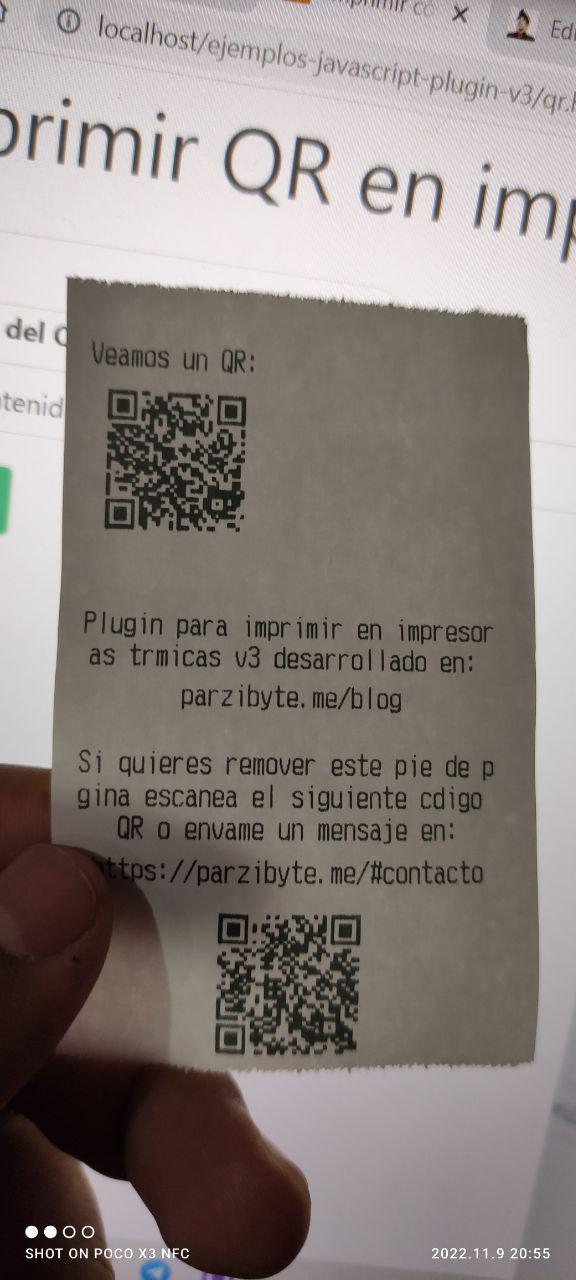
conector.EscribirTexto("Veamos un QR:");
conector.Feed(1);
conector.ImprimirCodigoQr(contenido, 160, 2, ConectorPluginV3.TAMAÑO_IMAGEN_NORMAL);
conector.Iniciar(); //Nota: esto solo es necesario en ocasiones, por ejemplo en mi impresora debo hacerlo siempre que acabo de imprimir una imagen
conector.Feed(1);
const respuesta = await conector
.imprimirEn(nombreImpresora);
if (respuesta === true) {
alert("Impreso correctamente");
} else {
alert("Error: " + respuesta);
}
}
You can call the ImprimirCodigoQr method after or before anything, and align it like everything else, just make sure you call it after a Feed.
Remember to put the name of your printer when calling imprimirEn. When testing it in my case it is like this:
Try it yourself
If you want to generate and print QR codes by yourself without writing any line of code, navigate to this example (remember that the plugin must be running and the printer must be shared).
You can see its code here.