In this post I will show you how to print a receipt in a thermal printer directly from web browser, without user interaction and confirm dialogs, by using a free plugin.
Step 1: download the plugin
You have to download the plugin, it’s for free, just go to the next link:
https://github.com/parzibyte/plugin-impresora-termica-v3/releases/latest
If it asks you for firewall permission allow it, it is not a malicious file.
Step 2: share your printer
Step 3: the javascript library
In your project, include the JavaScript library called ConectorJavaScript.js. You can download it from the GitHub repo, or from the docs.
When you include the library, the classes Operacion and ConectorPluginV3 will be available.
Step 4: hello, thermal printer
Now you can create a new ConectorPluginV3 instance:
let conector = new ConectorPluginV3(null, "optional license");
The class constructor accepts a distinct URL if you want to provide a different port in the future, you are not forced to indicate the URL, by defualt it is localhost:8000.
Once you have the instance, you can, for example, call the EscribirTexto method (to write text) and finally the imprimirEn method passing the printer’s name.
const conector = new ConectorPluginV3(URLPlugin);
conector.Iniciar();
conector.EscribirTexto("Hola mundo\nParzibyte.me");
conector.Feed(1);
const respuesta = await conector
    .imprimirEn(nombreImpresora);
if (respuesta === true) {
    alert("Impreso correctamente");
} else {
    alert("Error: " + respuesta);
}
When the promise is resolved you should get a ticket printed in your thermal printer, if not, check the docs again and make sure you followed all the steps.
If it returns true, then it was successfull, if it does not, then the error message will be in the result variable.
Remember: you can check all the examples source code.
Example: plugin capabilities
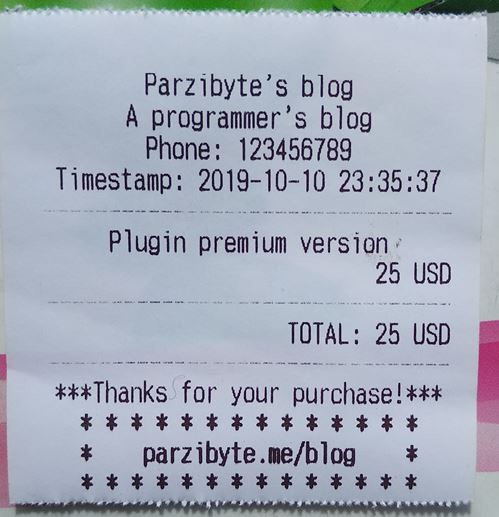
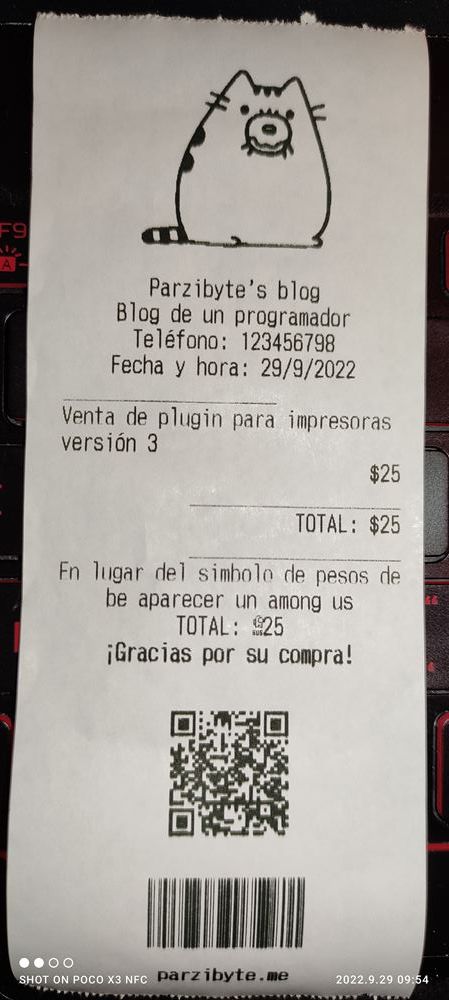
We will get a ticket like this, where we can set the font, alignment and some other things:
The code is as follows:
const demostrarCapacidades = async (nombreImpresora) => {
    const conector = new ConectorPluginV3(null, "license here");
    const respuesta = await conector
        .Iniciar()
        .DeshabilitarElModoDeCaracteresChinos()
        .EstablecerAlineacion(ConectorPluginV3.ALINEACION_CENTRO)
        .DescargarImagenDeInternetEImprimir("http://assets.stickpng.com/thumbs/587e32259686194a55adab73.png", 0, 216)
        .Feed(1)
        .EscribirTexto("Parzibyte's blog\n")
        .EscribirTexto("Blog de un programador\n")
        .TextoSegunPaginaDeCodigos(2, "cp850", "Teléfono: 123456798\n")
        .EscribirTexto("Fecha y hora: " + (new Intl.DateTimeFormat("es-MX").format(new Date())))
        .Feed(1)
        .EstablecerAlineacion(ConectorPluginV3.ALINEACION_IZQUIERDA)
        .EscribirTexto("____________________\n")
        .TextoSegunPaginaDeCodigos(2, "cp850", "Venta de plugin para impresoras versión 3\n")
        .EstablecerAlineacion(ConectorPluginV3.ALINEACION_DERECHA)
        .EscribirTexto("$25\n")
        .EscribirTexto("____________________\n")
        .EscribirTexto("TOTAL: $25\n")
        .EscribirTexto("____________________\n")
        .EstablecerAlineacion(ConectorPluginV3.ALINEACION_CENTRO)
        .HabilitarCaracteresPersonalizados()
        .DefinirCaracterPersonalizado("$", amongUsComoCadena)
        .EscribirTexto("En lugar del simbolo de pesos debe aparecer un among us\n")
        .EscribirTexto("TOTAL: $25\n")
        .EstablecerEnfatizado(true)
        .EstablecerTamañoFuente(1, 1)
        .TextoSegunPaginaDeCodigos(2, "cp850", "¡Gracias por su compra!\n")
        .Feed(1)
        .ImprimirCodigoQr("https://parzibyte.me/blog", 160, ConectorPluginV3.RECUPERACION_QR_MEJOR, ConectorPluginV3.TAMAÑO_IMAGEN_NORMAL)
        .Feed(1)
        .ImprimirCodigoDeBarrasCode128("parzibyte.me", 80, 192, ConectorPluginV3.TAMAÑO_IMAGEN_NORMAL)
        .Feed(1)
        .EstablecerTamañoFuente(1, 1)
        .EscribirTexto("parzibyte.me\n")
        .Feed(3)
        .Corte(1)
        .Pulso(48, 60, 120)
        .imprimirEn(nombreImpresora);
    if (respuesta === true) {
        alert("Impreso correctamente");
    } else {
        alert("Error: " + respuesta);
    }
}
Once we have an ConectorPluginV3 instance we can call EscribirTexto to write simple text, Feed to feed paper, Pulso to open cash drawer, ImprimirCodigoDeBarras to print barcode, Corte to cut paper, EstablecerAlineacion to align and finally imprimirEn to print it in the printer we pass as argument.
Now you can use your thermal printer and create awesome receipts. The full docs are here:
Remember that once you have the plugin running and your printer shared, you can try the demos: https://parzibyte.github.io/ejemplos-javascript-plugin-v3/hola.html and check the source code: https://github.com/parzibyte/ejemplos-javascript-plugin-v3/

i want to use the premium plugin, is that working the Xprinter 600 0 series, please confirm even its a demo mode still fine to make sure its working i tried demo above The printer has not been set, either because the action has not been performed or because there are no valid printers, remember that if you want to print ,first you must set the printer, and then try to print got this error
Hi. If it works with the free version, it will work with the premium one
Hi Parzibyte,
Nice article, but do you have example in Angular? I am trying to open your example in my chrome browser. It brings the list of all printers available in my machine, but unfortunately when I click on set as default printer it gives me error as cannot set the default printer, I have followed all the steps (installed plugin, share the printer etc.)
https://parzibyte.github.io/plugin-ticket-js/en/examples/simple/index.html.
your quick response is highly appreciated.
Thanks and regards
Murtuza
It gives me the following error Response: Error en el servidor: sql: no rows in result set
Please refer to the faq: https://parzibyte.github.io/plugin-ticket-js/en/#faq
Thanks 🙂
it keeps telling me connection refused to localhost 8000 I tried changing to 8080 but still the same, how do I go about it.
Could you please provide an example about the error? thanks
Your source code, for example, is not in English which makes it bit difficult to understand it can you please upload an English version if it’s not too much trouble.
Hello. I’m sorry but i can’t translate the code, only the explanation. I guess that if you know how to code, the variable names do not matter.
Regards 🙂