Install web server and process PHP files: build a LAMPP stack on Android
This is not a post of those who use tricks to attract visitors, we are really going to install an Apache server on Android, configure it to process PHP files and finally write a Hello World: everything running from our mobile device.
Summary
You will learn to configure Apache and PHP in Android without the phone being rooted and without you dying in the attempt, thanks to the application of Termux and some packages.
Requirements
Look at this tutorial to install and configure Termux, as well as to learn its basics and take out the help keys.
Step 1: update packages
When you have installed termux, execute these commands:
apt update
And then:
apt upgrade
If it asks you, choose yes in both cases.
Step 2: Install Apache and PHP 7
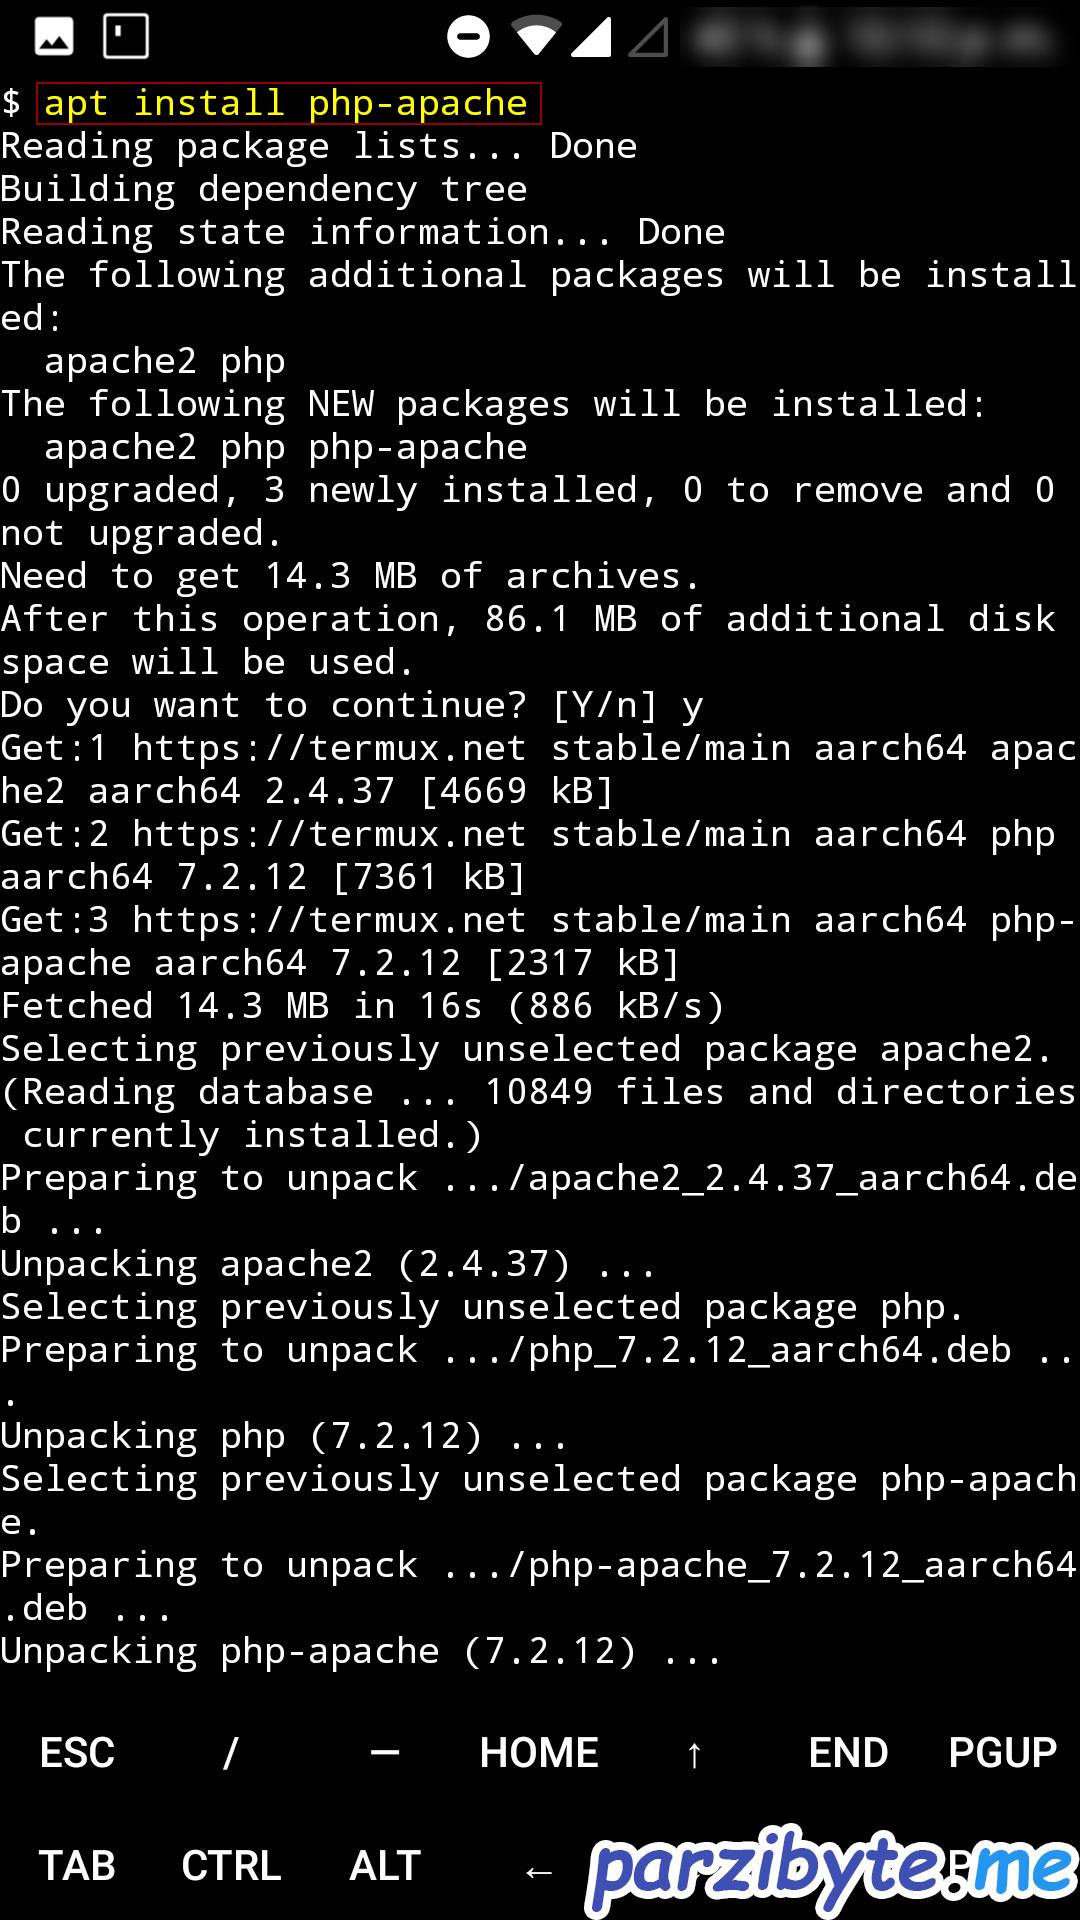
There is already a package that serves to install these two things together. That is, through apache PHP files are processed. To install our LAMPP on Android we will run:
apt install php-apache
That will install apache, PHP and some libraries that will allow us to combine both things.
With that we have everything ready, we need to fine-tune the configurations.
Step 3: Install Nano
Nano is a text editor that works in the terminal. It is important to install it because we will have to modify the apache configuration file. To install it simply run this command:
apt install nano
The basic commands are to press Ctrl + o to save changes and Ctrl + x to exit. Ctrl + w is used to search the file; and if you want to learn more, look for the manual in Google.
For the keys like TAB and CTRL to appear, look at the link that I left above for you to configure Termux as it should.
Step 4: configure apache to process the PHP files
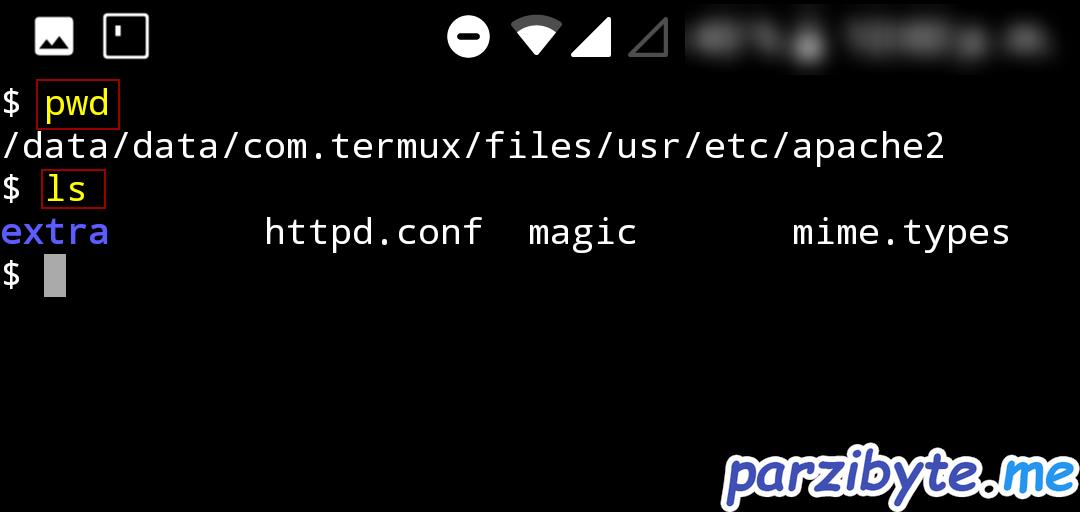
We are going to configure the httpd.conf file; attention here, because the route is important. The apache configuration file is in:
/data/data/com.termux/files/usr/etc/apache2/httpd.conf
You can change to that dir with:
cd /data/data/com.termux/files/usr/etc/apache2/
Then open the file with nano:
nano httpd.conf
Here is a screenshot of what the directory where this important file looks like:
In this file we will modify some things.
4.1 Load PHP module
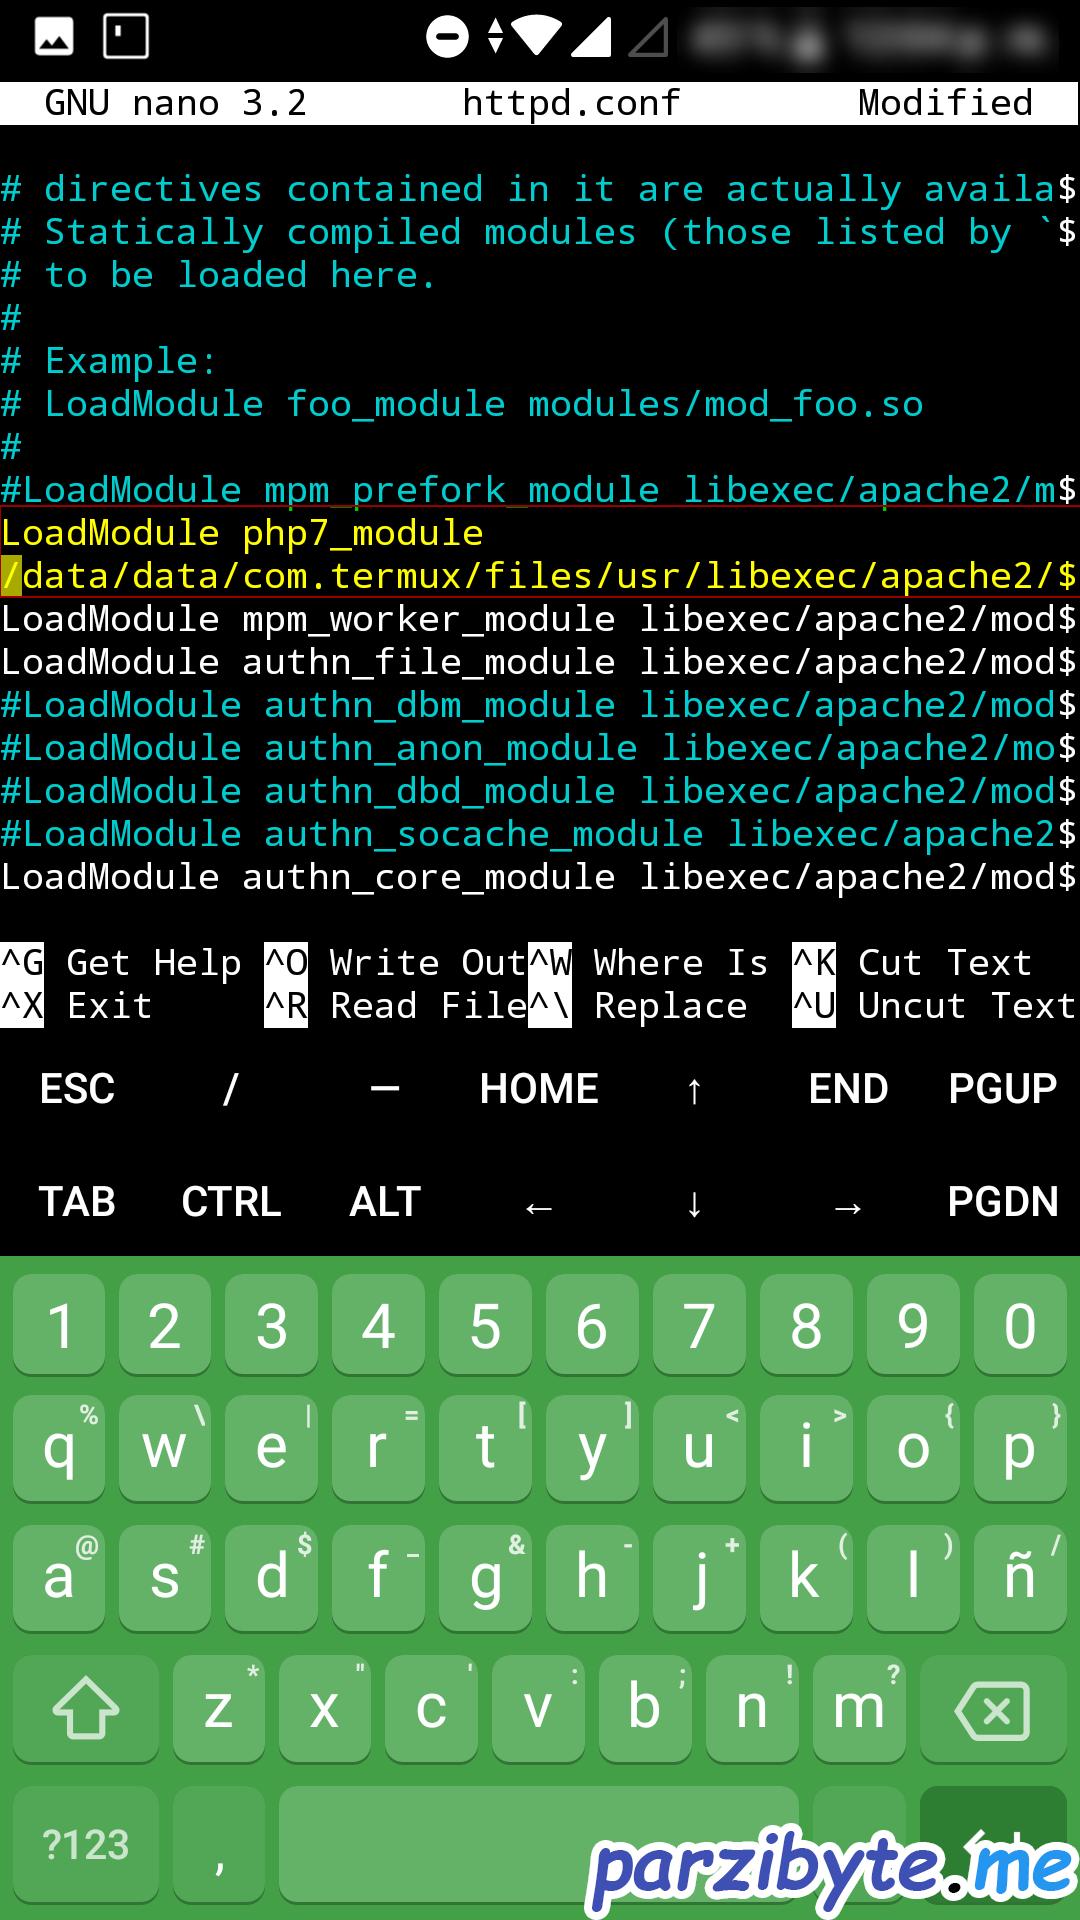
In the file that we are editing we will look for a section where the modules are loaded, you should see something like this:
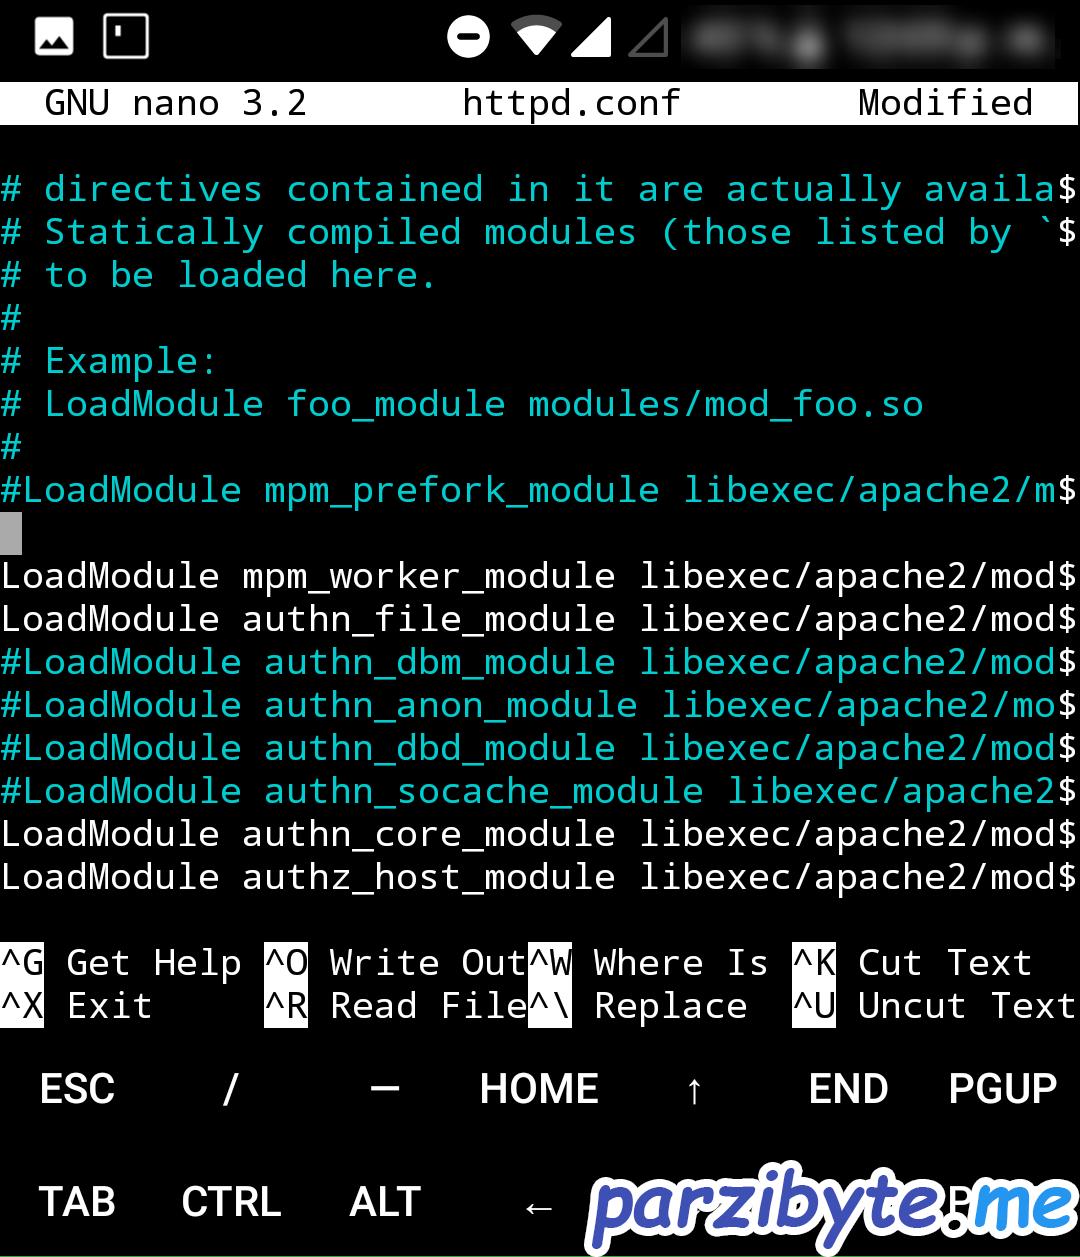
Right there we are going to add a new line with this content:
LoadModule php7_module /data/data/com.termux/files/usr/libexec/apache2/libphp7.so
What we are doing is loading the PHP 7 module that is in the path that is above. Although the image does not look complete and you see that there is a line break ignore it; put the command that I put as is.
4.2 Set handler
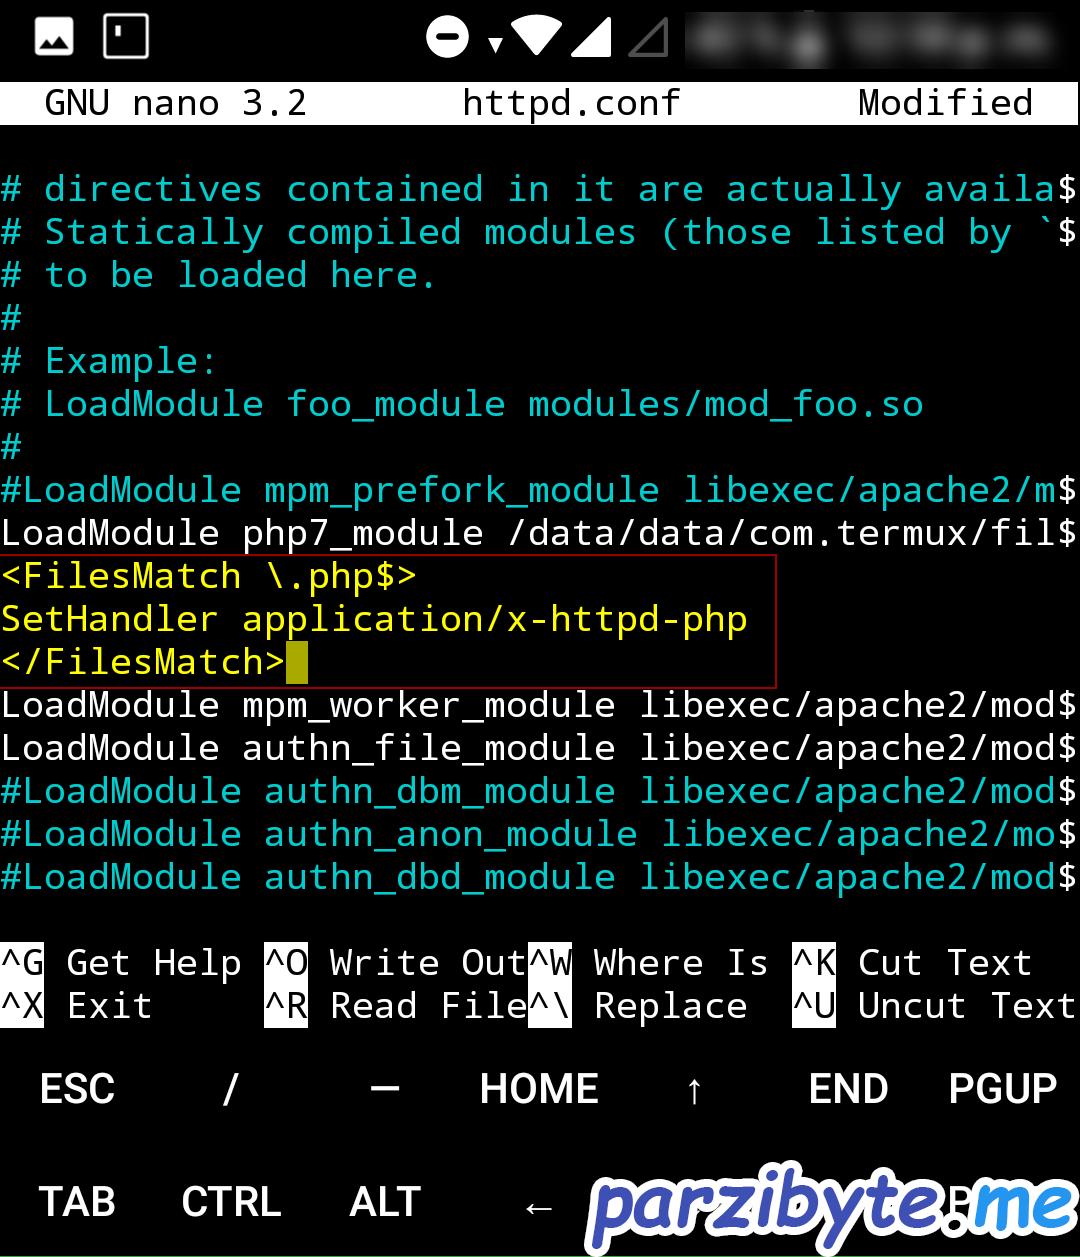
That’s not all, now below where we load the module we add this:
<FilesMatch \.php$>
  SetHandler application/x-httpd-php
</FilesMatch>
We are telling Apache that files that comply with a regular expression (where the file is one of PHP) are processed by a handler.
4.3 Change index
To finish (and this is not so necessary) we will look for the fragment where is a code like the following:
<IfModule dir_module>
  DirectoryIndex index.html
</IfModule>
We are going to change it to PHP so that it looks like this:
<IfModule dir_module>
  DirectoryIndex index.php
</IfModule>
We do this to tell apache to serve index.php over index.html (this is an adjustment and that does not mean we can not serve HTML).
For example, if we visit site.com apache will default to index.html, instead this adjustment will serve index.php. Save changes and close the file.
Step 5: write hello world PHP and see public directory
Our htdocs folder is located in (I mean, its route is):
/data/data/com.termux/files/usr/share/apache2/default-site/htdocs
So whatever thing or file we put there will be served. And if we put a PHP file it will be processed. We navigate there and create the index.php with:
nano index.php
Inside it we put the following content:
<?php
phpinfo();
Then we save it.
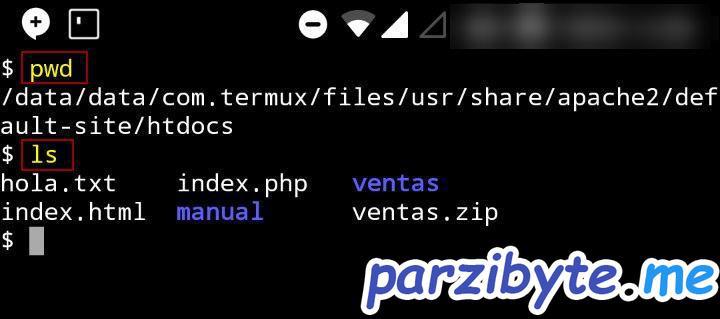
The image above is only to show where is htdocs located.
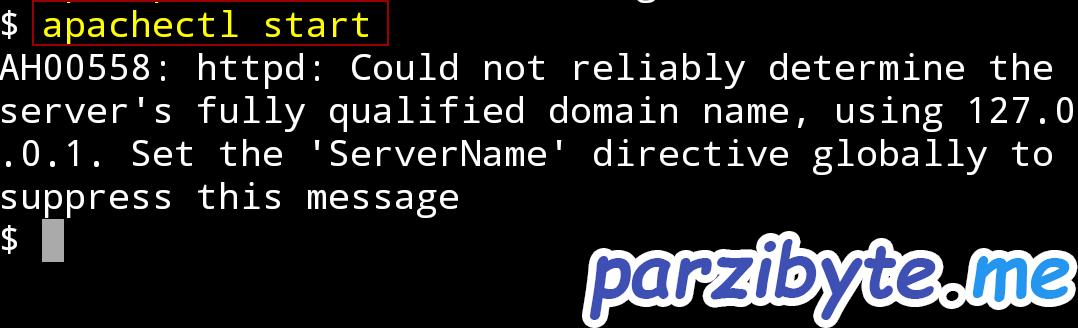
Step 6: Start apache
What remains is to start the apache daemon. For this we use the command:
apachectl start
If it does not show errors (apart from the one that says that you can not determine the domain server as seen in the image) then everything is fine.
Update 2020: error starting apache on android
These days I have been reported some errors. If the following appears to you, please continue reading this section; If not, continue with the next step:
apache is running a threaded mpm but your php module is not compiled to be threadsafe
To fix it, we need to edit the httpd.conf file mentioned above, on the lines that contain “LoadModule”. We must comment the following line:
LoadModule mpm_worker_module libexec/apache2/mod_mpm_worker.so
So it looks like this:
#LoadModule mpm_worker_module libexec/apache2/mod_mpm_worker.so
In addition, we uncomment the following line:
#LoadModule mpm_prefork_module libexec/apache2/mod_mpm_prefork.so
So it looks like this:
LoadModule mpm_prefork_module libexec/apache2/mod_mpm_prefork.so
Here is an image of what it should look like:

That should fix the error.
See server on web browser
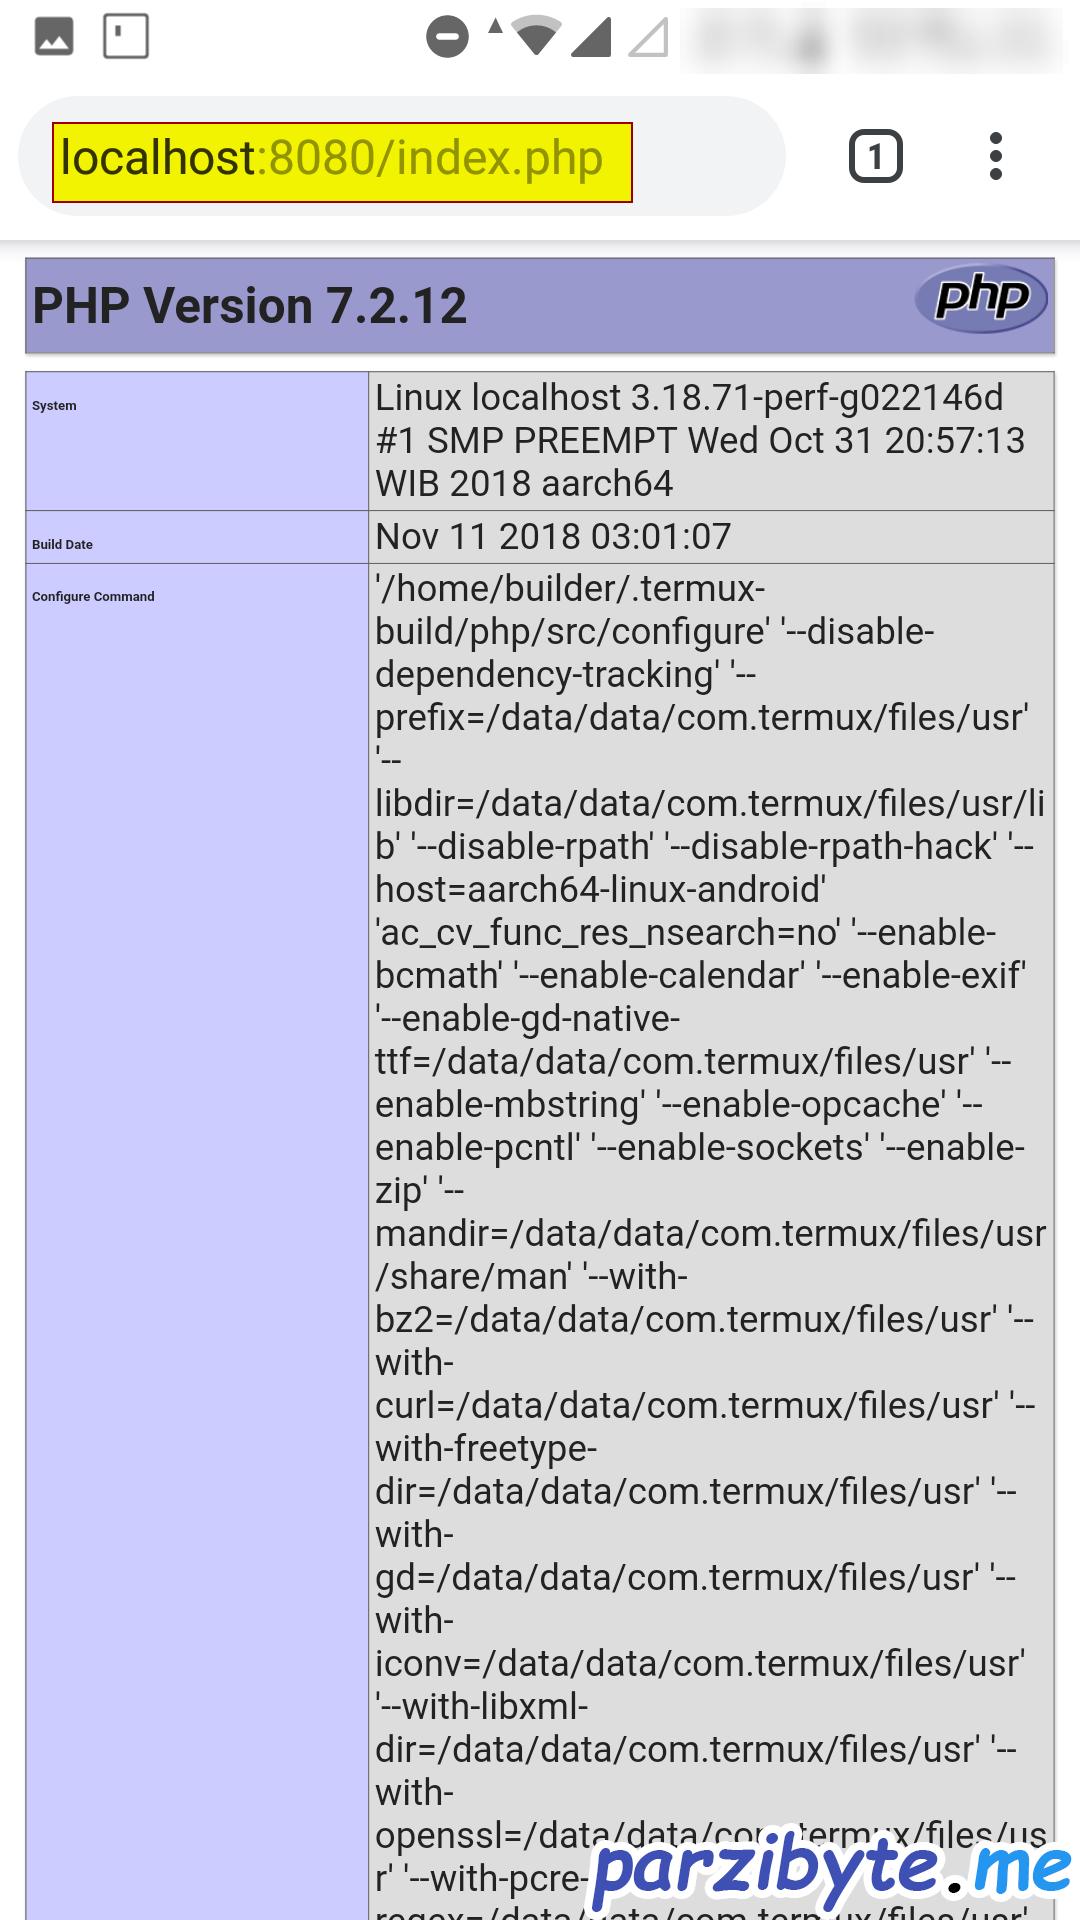
We open Chrome (or our browser) and we go to:
localhost:8080/index.php
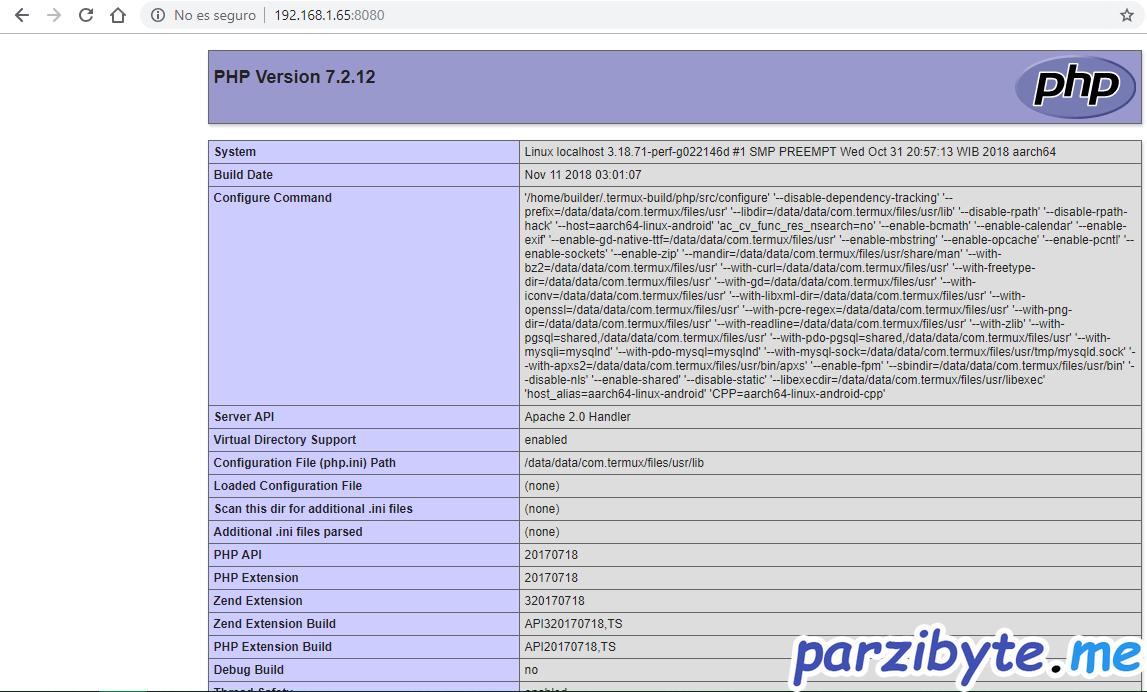
You will see something like this:
We have achieved it; that is the information of the PHP version that we have installed on our Android system.
As you can see, we have PHP version 7.2.12; and the Apache server obviously works. In fact, from another computer that is in the same network of your Android you can put the IP address of the same in port 8080 and you will see that it connects:
Conclusions and notes that you should not ignore
Remember that you can run PHP files from the terminal as we do in Windows (with php -f). You can also enter the interactive mode with php -a
To work with the apache daemon you can run apachectl start, apachectl stop and apachectl restart to start it, stop it and restart it respectively.
It should be mentioned that in the htdocs folder you can put any file (image, video, text file, HTML file, etc.) and it will be served as it is normally done.
With this you already have a LAMPP stack on Android: Linux, Apache, MySQL and PHP. You can mount any application that you would mount on a server with Linux.
If you want to know how to install the MariaDB server on Android visit: install MySQL on Android.