Install Termux on Android
Today we will see how to install and configure Termux on Android, as well as a brief introduction to its use.
Termux is an application that will allow us to have a terminal on our device, but apart from that it gives us the possibility of installing very interesting packages; and if we configure them well and install well, we can have a complete and stable server on our mobile.
This application does not require root access, you only need that our Android phone has a recent version (I think it works from Android 6).
Download Termux
Go to Google Play in this link. If you can install it you can follow the tutorial, and if not then it’s time to upgrade to a newer version.
Configure help keys
At the beginning, our app will look like a clean terminal, but we do not have keys that help us in a real terminal to which we are accustomed.
For example, there is neither the CTRL key nor the TAB key, or the navigation arrows to see previous commands.
To enable these keys we keep pressing the key that increases the volume and press the Q key of our keyboard. Now these keys will appear:
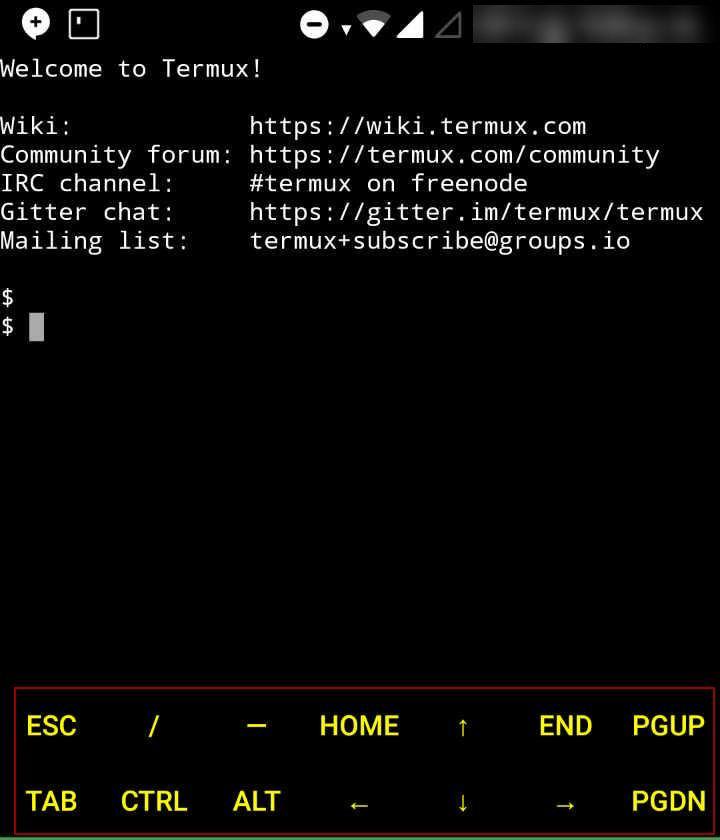
With that we give an extra functionality to our app. They are shortcuts that we do not have in our mobile keyboard.
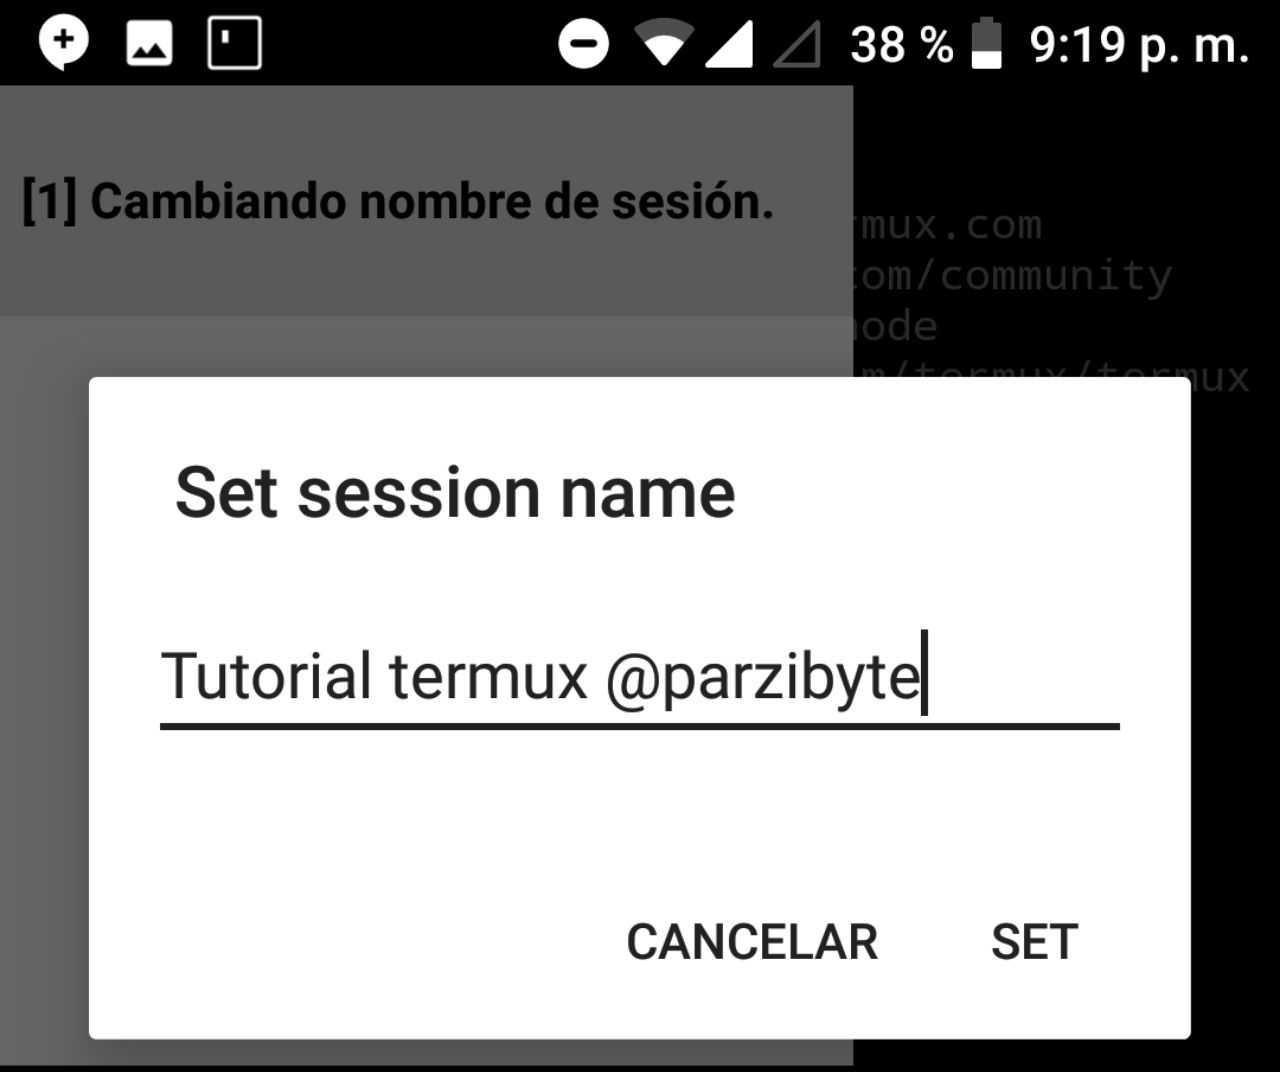
More sessions
If you want you can open more sessions or terminals, simply slide your finger from the left edge to the right (like when you open the navigation drawer) and you can create the ones you want in the new session button.

To rename a session, keep its number pressed and you will be able to change the name:
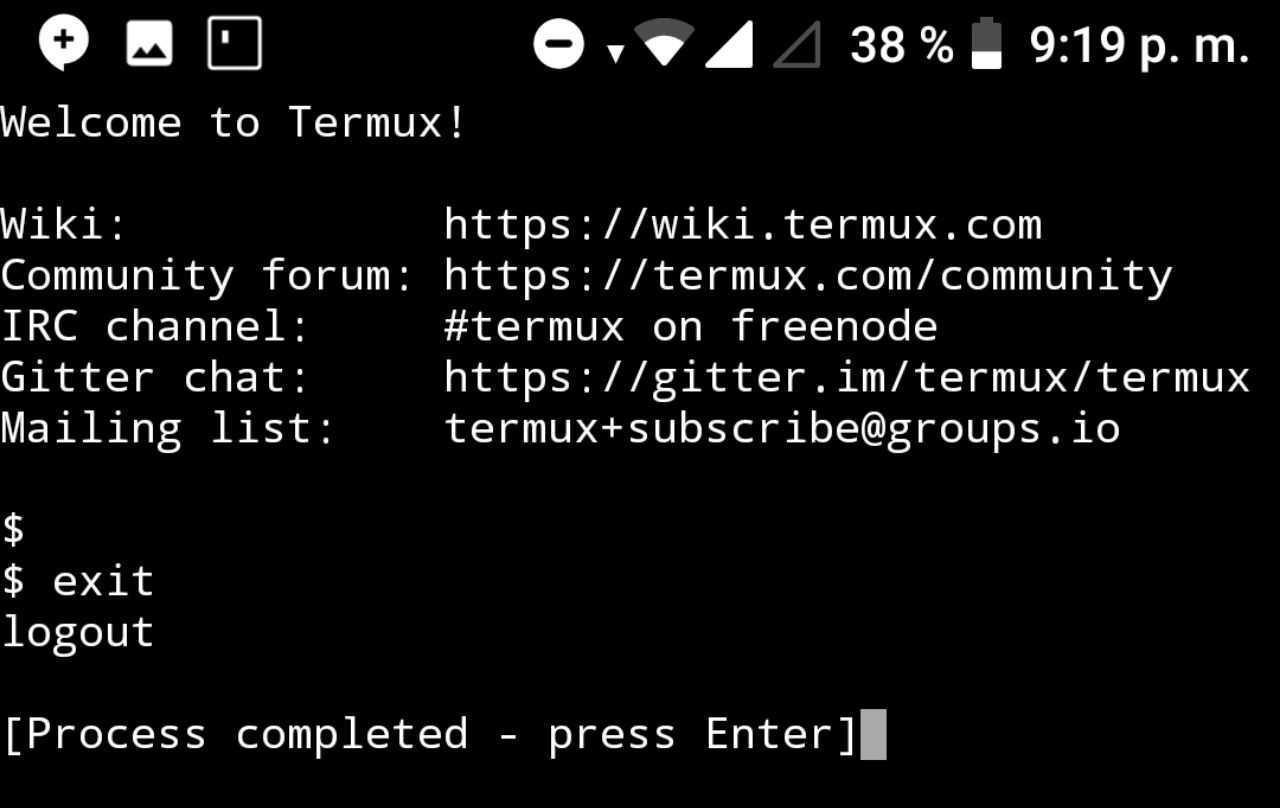
Exit and enter
To enter simply open the app, but even if you press the return button, it will still be there. To close Termux expand the notification and select EXIT. You can also simply type exit or logout in the terminal, as seen in the image:
Utilities
To have some basic commands (really basic Linux like ls and those things) we install the package with:
pkg install coreutils
Storage permission
Since Termux is an application like the others, we need to give you permissions so that you can modify the storage of the device.
For this we execute:
termux-setup-storage
This will make us ask for permits, and we will obviously give them. Now we can access our documents from ~/storage.
That is, it will be as if our documents were mounted and accessed from ~/storage. For example, to go to the downloads we execute:
cd ~/storage/downloads
References and conclusions
It seems simple but we have a powerful application that will make us feel like we have a Linux server in our pocket.
I invite you to read the Termux wiki, and if you want to learn more about Termux on my blog click here.