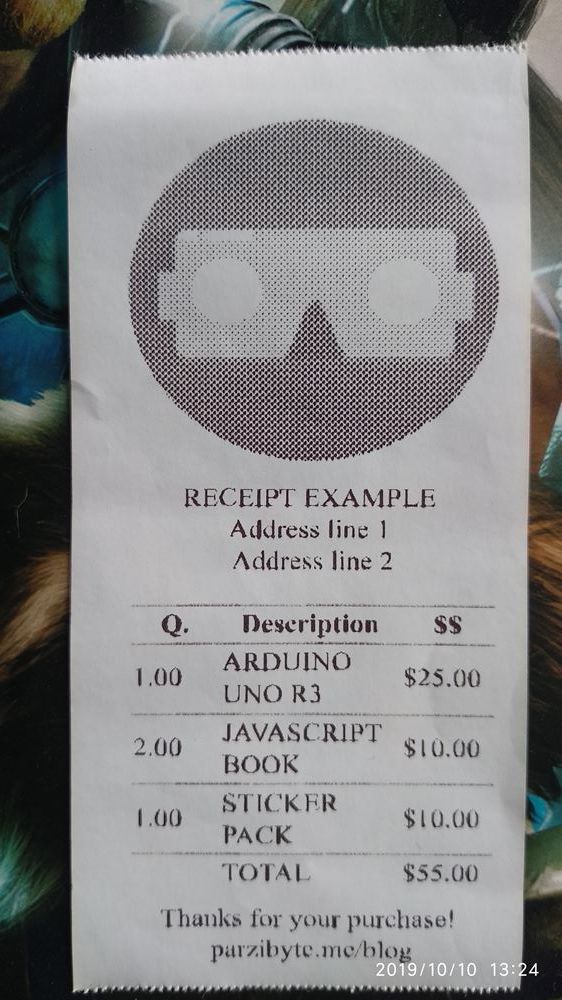
In this post I will show you how to print a ticket or receipt by using JavaScript (client side) and a thermal printer. At the end we will have a great ticket that looks like this:

Obviously you can change the font family, size, logo and so on. And remember: we will be using only pure CSS, HTML & JavaScript, no frameworks; though you can use any framework to render the content before printing.
You can see the demo here, and the full code on my GitHub.
Designing the ticket
First we have to write the HTML to print the ticket, in this case I will use a table to render the contents in a better way. Also, I’m using a image taken from pixabay. The code looks like this:
<!DOCTYPE html>
<html lang="en">
    <head>
        <meta charset="UTF-8">
        <meta name="viewport" content="width=device-width, initial-scale=1.0">
        <meta http-equiv="X-UA-Compatible" content="ie=edge">
        <link rel="stylesheet" href="style.css">
        <title>Receipt example</title>
    </head>
    <body>
        <div class="ticket">
            <img src="./logo.png" alt="Logo">
            <p class="centered">RECEIPT EXAMPLE
                <br>Address line 1
                <br>Address line 2</p>
            <table>
                <thead>
                    <tr>
                        <th class="quantity">Q.</th>
                        <th class="description">Description</th>
                        <th class="price">$$</th>
                    </tr>
                </thead>
                <tbody>
                    <tr>
                        <td class="quantity">1.00</td>
                        <td class="description">ARDUINO UNO R3</td>
                        <td class="price">$25.00</td>
                    </tr>
                    <tr>
                        <td class="quantity">2.00</td>
                        <td class="description">JAVASCRIPT BOOK</td>
                        <td class="price">$10.00</td>
                    </tr>
                    <tr>
                        <td class="quantity">1.00</td>
                        <td class="description">STICKER PACK</td>
                        <td class="price">$10.00</td>
                    </tr>
                    <tr>
                        <td class="quantity"></td>
                        <td class="description">TOTAL</td>
                        <td class="price">$55.00</td>
                    </tr>
                </tbody>
            </table>
            <p class="centered">Thanks for your purchase!
                <br>parzibyte.me/blog</p>
        </div>
        <button id="btnPrint" class="hidden-print">Print</button>
        <script src="script.js"></script>
    </body>
</html>
Remember: this is a static example, you can always use a framework (client side or server side) to render the content in a dynamic way.
We have some CSS Classes, for example “centered”. We have a button to print the ticket as well and we are loading a CSS file to give style.
Styiling receipt
Now we have to give some style to our receipt. Here’s the CSS code:
* {
    font-size: 12px;
    font-family: 'Times New Roman';
}

td,
th,
tr,
table {
    border-top: 1px solid black;
    border-collapse: collapse;
}

td.description,
th.description {
    width: 75px;
    max-width: 75px;
}

td.quantity,
th.quantity {
    width: 40px;
    max-width: 40px;
    word-break: break-all;
}

td.price,
th.price {
    width: 40px;
    max-width: 40px;
    word-break: break-all;
}

.centered {
    text-align: center;
    align-content: center;
}

.ticket {
    width: 155px;
    max-width: 155px;
}

img {
    max-width: inherit;
    width: inherit;
}

@media print {
    .hidden-print,
    .hidden-print * {
        display: none !important;
    }
}
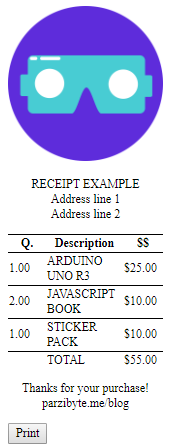
I’m giving a fixed width to each thing, this way we take a small space because the thermal paper is narrow. So far we have this:
Now we can print the ticket, or make the button to print it.
Hidding the button
In CSS we have the hidden-print class, that class is used to hide the button when we print the receipt.
Printing ticket in thermal printer
The JavaScript code is small. It is like this:
const $btnPrint = document.querySelector("#btnPrint");
$btnPrint.addEventListener("click", () => {
    window.print();
});
We are only calling window.print to tell the browser to print the document. When we press it, depending on the browser, a window appears, and there we can select the printer and some features.
Note: if you want to hide the dialog, you can use my plugin.
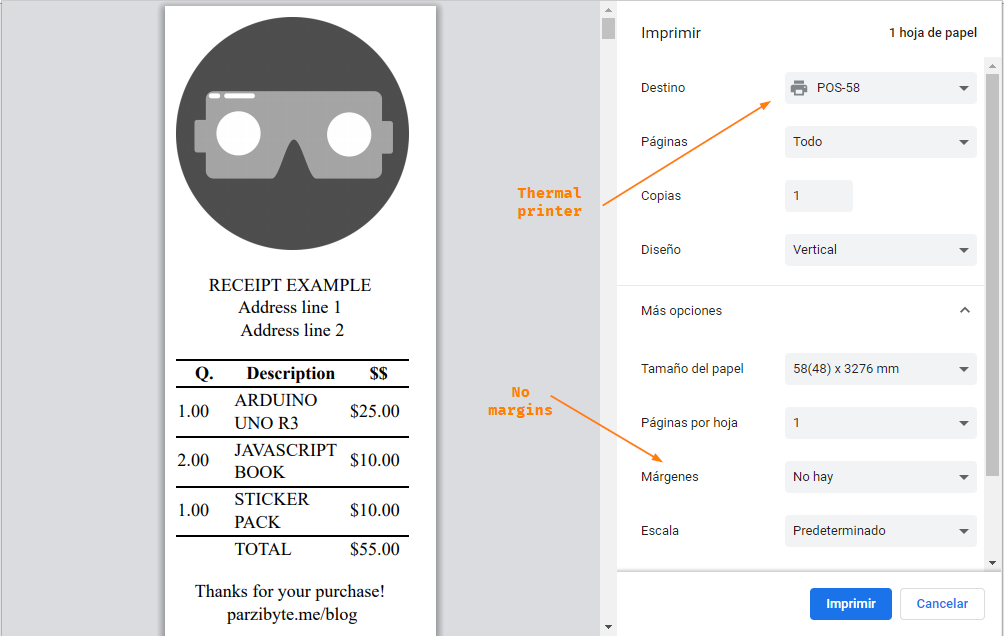
I am using Chrome, the thermal printer I have is a Xprinter 58, please note that I am not using any margins, so we can take the full space:
And when I click “Print” Chrome sends the receipt to the printer and we have this:
 Conclusion
In this way we can print anything by using a Thermal printer, CSS, HTML and JavaScript. The only issue is that we have to confirm the action, but I have developed the solution by using a plugin.


Thanks a lot for this, I searched all over the internet for a solution to print labels with thermal printer but only urs gave the me answer I wanted!!
I used your script and it works well.
I’m using Xprinter 58, but the print is not cover the page very well.
It covers 3/4 of the width.
please how do I solve the problem
https://parzibyte.me/plugin-impresora-termica-v1/
Hello, I am getting blank output in the upper field. how can i remove?
It depends on your web CSS
Demo link is not working
Demo link is working for me
Hi, im working for a big health care center organization.
All we missing currently is a good way of printing. And consider the Printer frontend is React (JS) your plugin looks like really nilice feature to have.
We are willing to pay an amount if the printer plugin is functional in the system.
please reply!
Hi author,
Thank you for your blog. I am trying to do the test with your demo page. My thermal printer is TOSHIBA TRST A1X. I can not find its driver for MAC. And I use driver Zebra ZPL Label printer. And it printed the hex value, not your bill. Can you help me fix this. Thank you!
I wanna print font A of X-printer. How?
Hi,
I try to test your plugin, but i get an error:
Response: Error en el servidor: sql: no rows in result set
Can you advice me?
Regards
Hi. Please read the FAQ: https://parzibyte.github.io/plugin-ticket-js/en/#faq
Regards 🙂
Hey! Thank you very much for taking the time to write this. Very informative! However, I do have a silly question. You mentioned that you are using an Xprinter 58 – could you be more specific which one exactly your using? I want to avoid buying one and then not being able to print as you described in your post. would perhaps the following do the trick? (sorry for the long link)
Yes, the printer in the link is correct; I have an identical one.
Regards 🙂
thanks
I used your example to my project !
very very Helpful
Hey.
Will this work from a mobile phone if I connect the printer via bluetooth
Hi. It will only work when the printer is connected to the pc using usb. you can print from a mobile if you use a LAN
Regards 🙂
I have a question regard the page size. Maybe it’s me not understanding how thermal printers work. But I’m building an app where a section of HTML is to be printed. For some reason when our client tested it the whole roll of paper was being used.
Basically my question is whether there’s a way to set the page height to be printed? Or is this something that is handled automatically by the printer?
Maybe you should define a page height in your HTML and set properly your paper size. I was having the same errors so i developed a plugin: https://parzibyte.github.io/plugin-ticket-js/en/
Regards 🙂
Yes the page height might be the issue. I’ll have to continue testing 🙂 thanks for your reply!
Thanks a Lot
Hi. Did you use any external library to print using the thermal printer? I am building a php based point of sale project and so far all my research was pointing to using some external library eg – escpos-php.
Also what brand was the printer you used?
Thanks and would really appreciate your help!
Hello 🙂
No, i only used JS but if you want to print directly from browser(without dialog confirmation) check my plugin: https://parzibyte.me/blog/en/2019/10/13/print-ticket-in-thermal-printer-directly-from-browser/
My printer is Xprinter 58
Regards
Helpful
hey buddy!
thank you so much. I used your example to build my own receipt!
I am also about to test ur plugin!
You are welcome 🙂
Regards