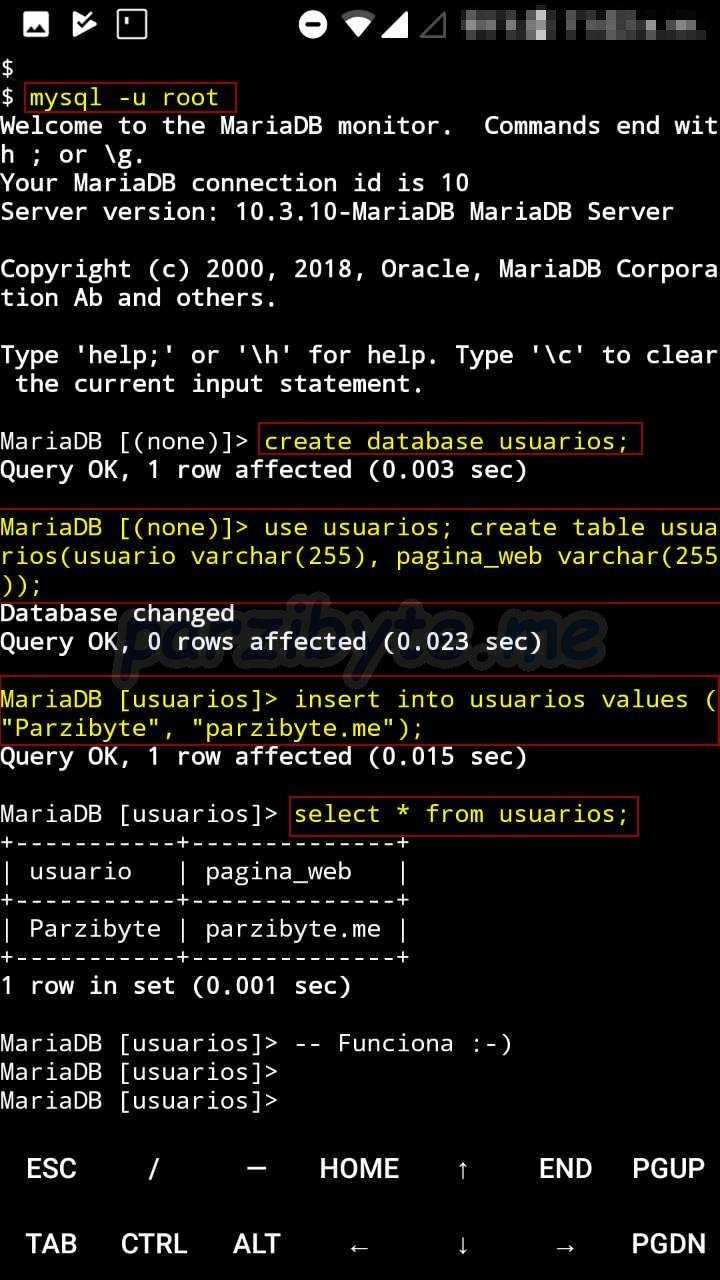
5 - Insertar datos y probar base de datos
Android mobile devices are not designed to be servers (although some of them are powerful), however it is always interesting to see how technology advances and day by day we can do more things with our phones.
Today we will see how to install the MySQL or MariaDB server on Android, thanks to the Termux application. For that it is enough to execute a few simple commands and voila, we will have a MySQL database server in our Android; fully functional and ready to execute queries.
If we want to put it for production, we can do it as long as we configure security. In short, we will not see more advanced topics; we will only see how to install mysql on Android.
Here we will use MariaDB and MySQL as synonyms; that is, if you see that I say MariaDB do not get confused, I mean MySQL; and vice versa.
I know that there are really more differences especially with the licenses, but that is another topic and you can search it in Google if you wish.
If you can install Termux everything is fine, you do not need your device to be rooted. I think that this APK works from Android 6.
See how it is installed, configured and downloaded here. Once you have it, we are going to start the tutorial.
In your Termux application execute:
apt update
And then:
apt upgrade
In both cases, if the app asks, choose yes, that is, put the letter y. This step is very important because it will update the libraries that are necessary to install mysql on our mobile device.
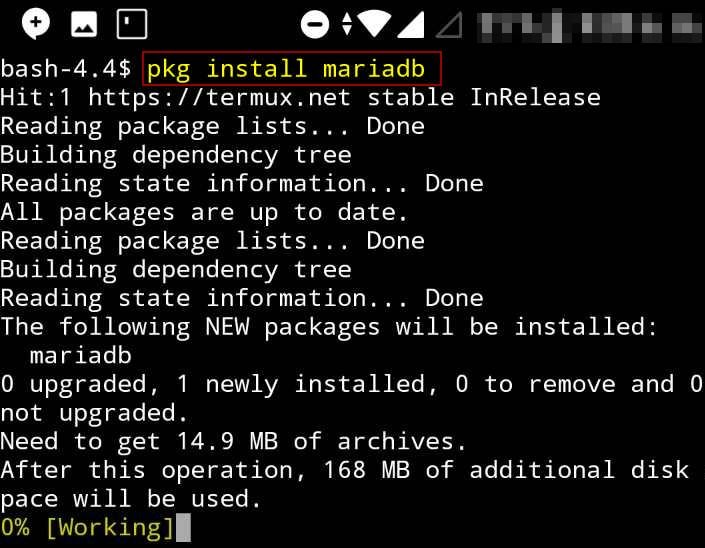
OK, once you have your system updated we will install the MariaDB package. To do this, execute:
pkg install mariadb
If it asks you, accept everything by writing the letter y. It may take a while, it depends on your device, so be patient.
We have installed it, here is a little note:
At least in my case the installation failed because there was no directory called my.cnf.d (very similar to the MySQL configuration file but that was not the case).
Then that directory has to be created. If you navigate to the location that I will tell you and it already exists, do nothing and return to $HOME.
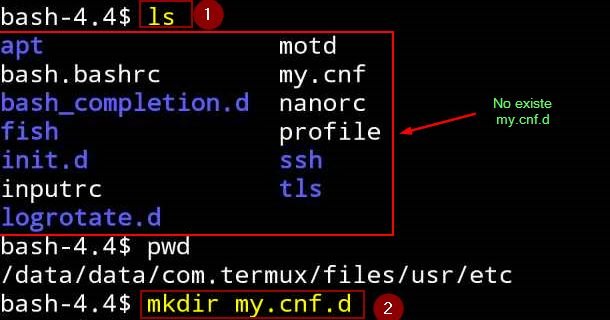
If not, then you create it. The folder that we are going to create must be located in /data/data/com.termux.files/usr/etc (if in your case it changes, I only tell you to browse a directory above $HOME and you will see a usr folder).
Let’s navigate there with:
cd /data/data/com.termux.files/usr/etc
Then list the content:
ls
And if the folder named my.cnf.d does not appear, you have to create it with
mkdir my.cnf.d
Here is an image about the creation of the dir:
As we can see, in step 1 the content is ready and the directory does not exist, so with mkdir I created the folder.
Once we have created the directory in case it does not exist, we execute this command:
mysql_install_db
We wait for it to be completed, with that we install and create the MariaDB directories (I think that the previous step, where we created the directory, is done automatically by this installer, but we already did it).
After that, what we have to do is start the MySQL daemon (this should also be done if we restart the phone).
To do this, execute:
mysqld_safe -u root &
What we do is run mysqld_safe with the root user; the ampersand & is to run it in the background.
Run it and press Enter. This is how it looks in my case:
We are almost done.
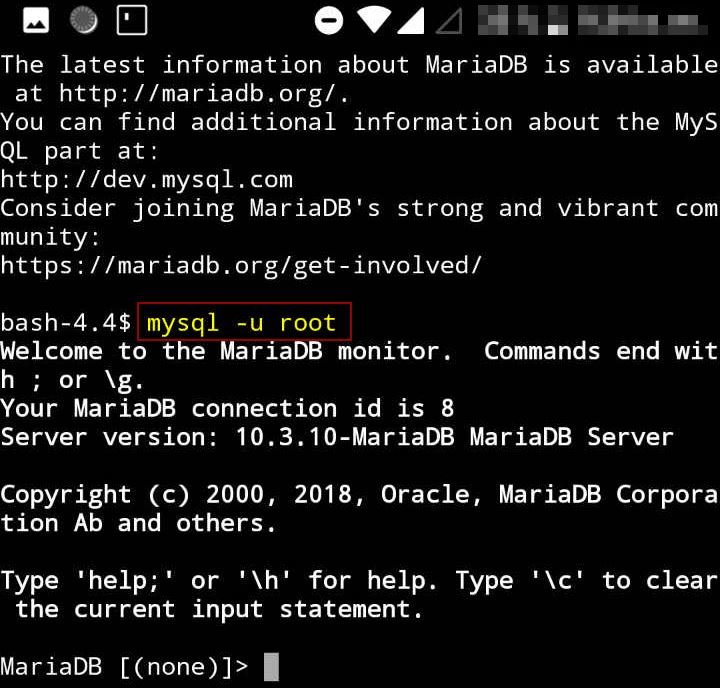
Now that we have started the daemon, it is time to connect from the client. To do this, execute:
mysql -u root
That must have shown you something like this:
If not, make sure you started the demon.
To verify that this works we will insert some data in our server:
If you want to stop the process, find the ID from whichever process that has the word “mysql” using ps with grep, and then kill them with kill -9 [ID], the -9 is to send a KILL SIGNAL.
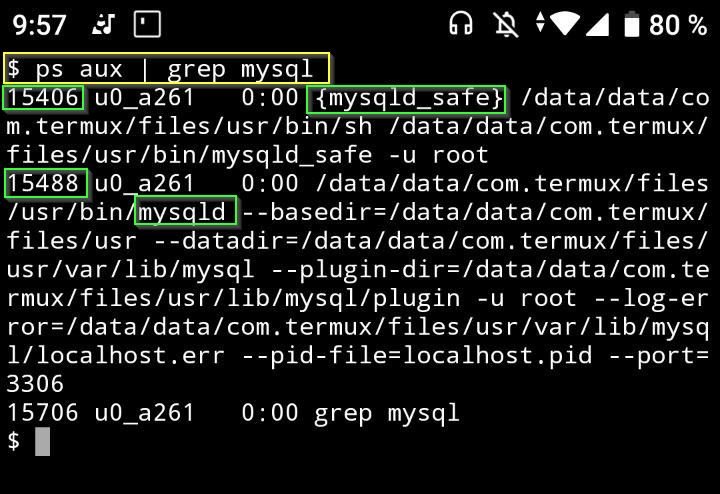
To find the processes IDs execute:
ps aux | grep mysql
We are passing the ps output through a pipe to grep to search for those with mysql inside.
If you take a look, they are two processes with 15406 and 15488 ids. The third is from grep but we omit it. Remember that it will change in your case because the process id isn’t always the same.
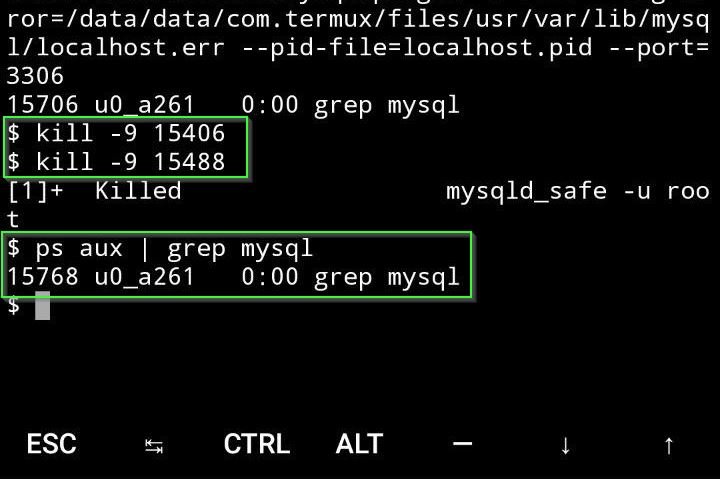
When you have the IDs kill them:
kill -9 15406
kill -9 15488
If we list the processes again they don’t appear anymore:
To start the server again, execute the previous steps above.
The installation of MySQL is already working correctly, and if we are only going to play with it then we should not care about security.
But instead, if you want to ensure it by habit or by good practices you can do it. To do this, execute: mysql_secure_installation
Which will give you a wizard that will help you to ensure your installation of MySQL: enter a password, remove test privileges, among others.
You already have a MySQL server installed on your Android. It’s time to try some basic commands from this database engine.
By the way, if you reboot your phone the server will stop, just rerun the daemon as we saw up there.
Click here if you want to learn more about Termux.
In the last months I have been working on a ticket designer to print on…
In this post you will learn how to use the Origin Private File System with…
In this post you will learn how to download a file in the background using…
In this post I will show you how to use SQLite3 directly in the web…
In this tutorial, we'll explore how to effortlessly print receipts, invoices, and tickets on a…
When printing receipts on thermal printers (ESC POS) sometimes it is needed to print images…
Esta web usa cookies.
Ver comentarios
I need help i did everything is ok until i tried to start mysql it says that user access denied what is the solution
Is there any way to contact you? I need help with installation
Hi. Thank you for this. I need to import an .sql file, how do I do that? I Windows I just use source and the path to the sql file. In termux, I can't seem to figure it out. Thank you in advance.
Hi. Have you tried:
mysql -u your_user -p database_name
to stop mariadb I used the command "mysqladmin shutdown" worked well for me. no grep needed
Absolutely brilliant! This is powerful stuff!
This is very good, thanks for the post. However, just a quick pointer on a typo, the directory you referenced as under "cd /data/data/com.termux.files/usr/etc" is actually "cd /data/data/com.termux/files/usr/etc", you used a "." instead of "/" between "termux" and "files".
Hi, you are welcome.
Well, in my case the dir was as my post says, but if you got another dir maybe it changed with the new version or something so your comment may help another user with that dir.
Anyway, thank you
Very good