Source code of PHP file connection
Although there are millions of tutorials about MySQL and PHP, I decided to make mine but in a very very simple way. Before you start, you must have a basic knowledge in MySQL.
It is worth mentioning that we will not see good practices of databases, relationships, etc. We will use the tables as they are, without looking at normalization, or things like that.
Note: this tutorial uses PDO, but remember that we can also use mysqli functions. Personally I recommend PDO, because it is object oriented. However, I hope to write a tutorial about mysqli in the future.
We have to create a database, inside that database we can create tables. This file has the database and table definitions:
As you can see we will use a database called mysql_tutorial, and we will work with a table called person.
You can paste the file in your MySQL console or in phpmyadmin. For this example we will only save basic information.
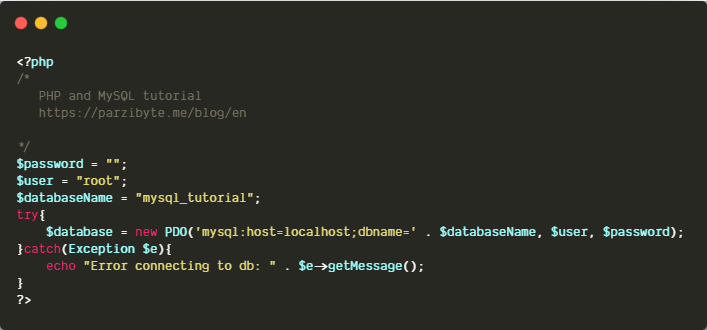
We have defined the table, but not the connection. We need to define a file with the user, database and password. Mine looks like this:
Remember to change your user and password according to your system. Pay attention to this file because we will use it to interact with the MySQL database.
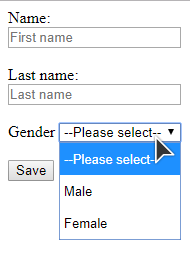
We have to define a form to ask user for data, for this we only need HTML:
The form action is add.php where we will process the data and save into MySQL table. Please check that we have marked the values as required, so the browser validates them.
Don’t forget to use the post method so the data is sent in the request body.
So far our form looks like this:
Now let’s take a look at the add.php file.
Now it’s time to use PHP to save the form. Please see the code:
First we make sure the form has data by using isset. If one of the fields are not present, we call exit so the script stops.
Then we include the database.php file, and when we include it, we can access to its variables (for example $database). Then we prepare a statement and use placeholders ? to prevent sql injections.
Please note that here we are using the insert statement.
The data is really inserted when we execute the statement, passing the true data in the same order as the placeholders.
We save the result and show a result depending on its value. If everything is ok you should see a “Inserted successfully” message, if not, check your credentials and code.
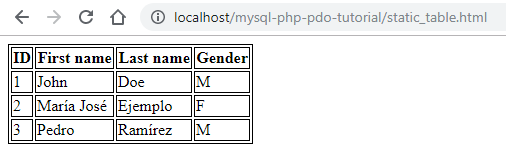
We can use a table to show the data from MySQL, but first we have to know how to render a static table. We can draw a basic HTML table like this:
If you pay attention, to show rows we use <tr> and to show cells inside rows we use <td>. If you see this file in the browser it looks like this:
First we have to make a query to bring the data from the table; by using PDO we can get it as an array. Then we only have to iterate the array and in each step draw a <tr> and the <td>s.
Let’s see the code:
We include the database.php file again, then we make a query and finally to get the array we call fetchAll. We are using PDO::FETCH_OBJ to bring the data as objects.
Then in line 24 we make a loop and iterate all the data. In each step we draw a new row.
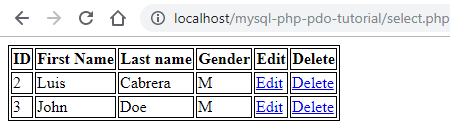
Please note that we added two links: one for edit and one for delete; and we are passing the id in the URL.
If you execute this code, depending on the data you have, you should see something like this:
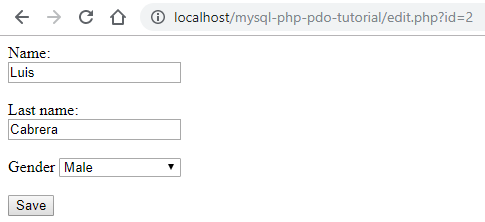
When we click edit, we see another form that is similar to the form to insert data but with the inputs filled:
First we make a query to get one record based on the id; we are using the select statement combined with where. As we ara passing the variable in the URL we get it from $_GET.
If the person does not exist, we stop the script.
Then we show the form again but fill the input with the value attribute. Pay attention to the hidden input, we will use it to update the record later (when we process the form).
Now the form action is update.php. If you list your data and click on edit, you should see a form like this:
This file is like the add.php but now we execute an update instead of an insert. The code looks like this:
We include the database file again, and prepare a statement using placeholders to prevent sql injections. Then we execute the update and show the results.
If you edit a record you should see a “saved” message; if not, check your code!
To finish this MySQL and PHP tutorial we have to see how to delete; in this case, for the sake of simplicity we are using the URL to delete a record.
The code is really simple, we execute a DELETE statement with WHERE; please note that we are using placeholders to prevent sql injections.
We get the id from $_GET and then execute a statement, that’s all.
You can download and see the full source code on my GitHub.
In the last months I have been working on a ticket designer to print on…
In this post you will learn how to use the Origin Private File System with…
In this post you will learn how to download a file in the background using…
In this post I will show you how to use SQLite3 directly in the web…
In this tutorial, we'll explore how to effortlessly print receipts, invoices, and tickets on a…
When printing receipts on thermal printers (ESC POS) sometimes it is needed to print images…
Esta web usa cookies.