How to install and configure Python 3 and pip on Windows 10
Introduction
In this post we will see how to install and configure the Python interpreter in its version 3 on Windows 10 (works even for 7, 8 and 8.1).
At the end we will be able to execute scripts and also to install third-party libraries using pip; which will make things easier for us.
Downloading the installer
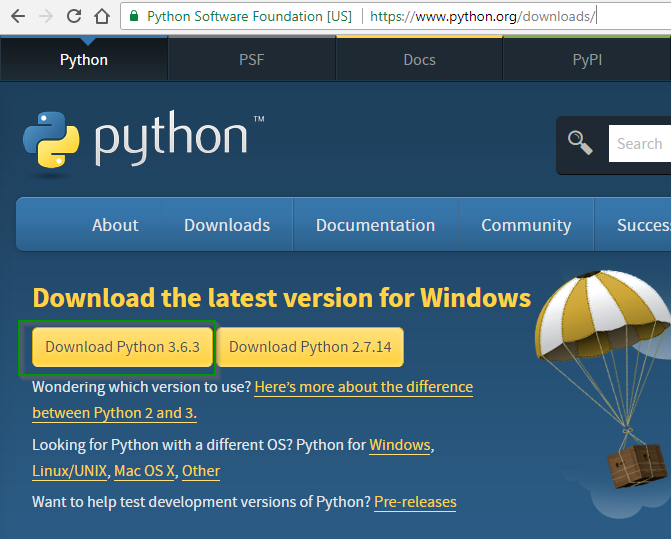
The first thing we have to do is go to python.org/downloads and get the current version. Once on the page, we choose Download Python 3.6.3 (or the number that is when we visit it, as long as it is 3)


Installing Python 3 on Windows
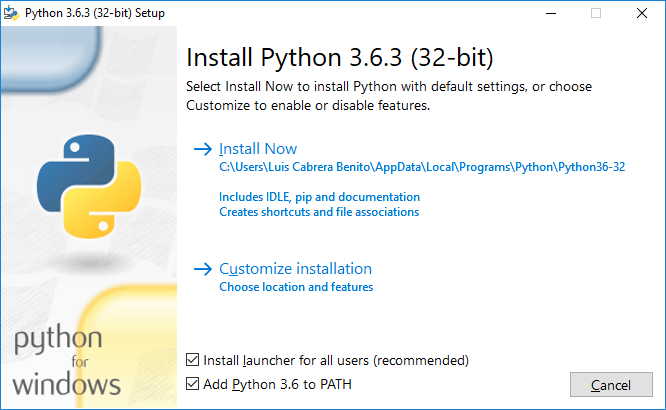
We download it and at the end of the download we execute it as administrator. The following interface will appear:
In it we will mark Install launcher for all users if we want all users to be able to use it. This box is optional.
It is necessary to mark the second option, which is to add the path of the interpreter to the PATH variable so that we can execute python.exe from anywhere on the command line (otherwise, we would have to always put the absolute path ).
Once configured, we click Install Now to start the process:
A few minutes later the installer will be finished:
Testing installation
Test python
To test if everything is ok we press the Windows + R (execute) key combination, in the box that comes out we wrote python and pres Enter:
The following window will appear, which is the interpreter. There we can execute code and make operations like sums, declare variables, etc.:
To exit, write exit() or simply close the window. I know, the code we wrote now was directly in the console, but it was just to test. In the next tutorials, our code will be saved in files with the extension py.
Test pip
Pip is the Python package and library manager. Something like what is npm to the Node environment. It allows to include third-party code in a very simple way.
To test it, we also open the window to execute and write cmd (or open the command prompt):
Once in the command prompt, we type pip --version. It should yield a result like the one below:
Conclusion
If no step failed it means that we have successfully finished installing and configuring Python. It is important to emphasize that we didn’t have to write the complete path (in my case it would be C:\Users\Luis Cabrera Benito\AppData\Local\Programs\Python\Python36-32\python.exe) and we did not have to navigate to the directory where it is installed.
This is the advantage we get when we add it to the PATH variable, which we can execute from wherever we want without writing the full and long path.
We are ready to start testing this wonderful language.
Learn more about Python in my blog.
Entradas recientes
Receipt designer for thermal printers – Free and open source
In the last months I have been working on a ticket designer to print on…
JavaScript: store and read files with the Origin Private File System
In this post you will learn how to use the Origin Private File System with…
JavaScript: download file with fetch
In this post you will learn how to download a file in the background using…
SQLite3 with vanilla JavaScript and OPFS – Hello world
In this post I will show you how to use SQLite3 directly in the web…
Python Thermal Printing: A Comprehensive Guide for Printing on Thermal Printers
In this tutorial, we'll explore how to effortlessly print receipts, invoices, and tickets on a…
Image printing on Thermal printer
When printing receipts on thermal printers (ESC POS) sometimes it is needed to print images…


